Bonsai Tree
April 2023

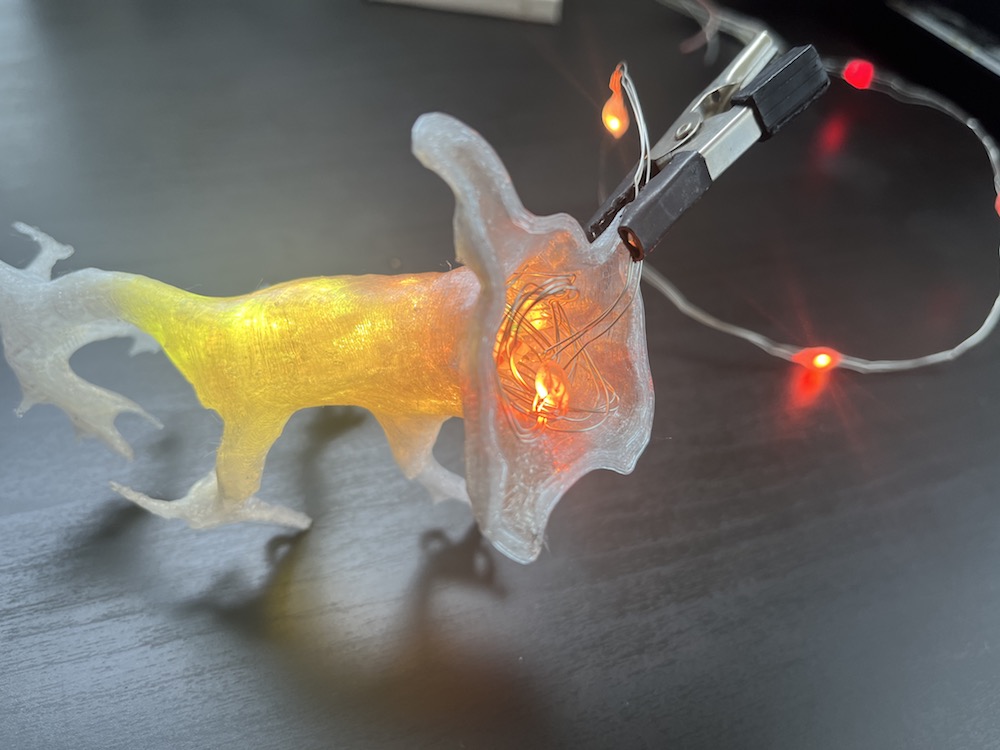
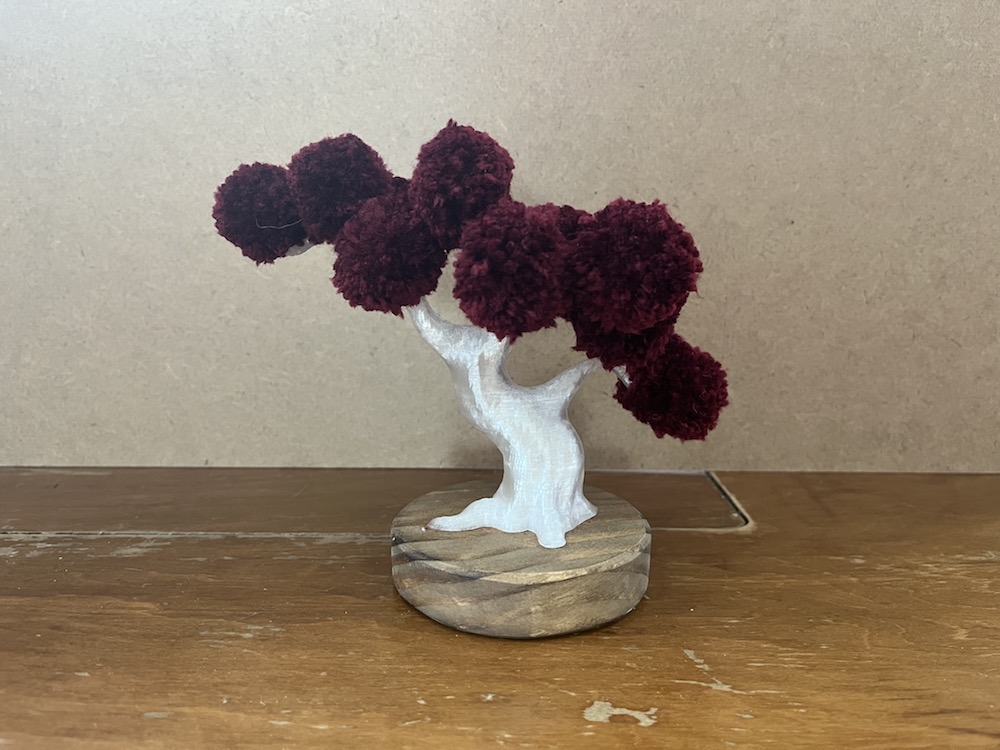
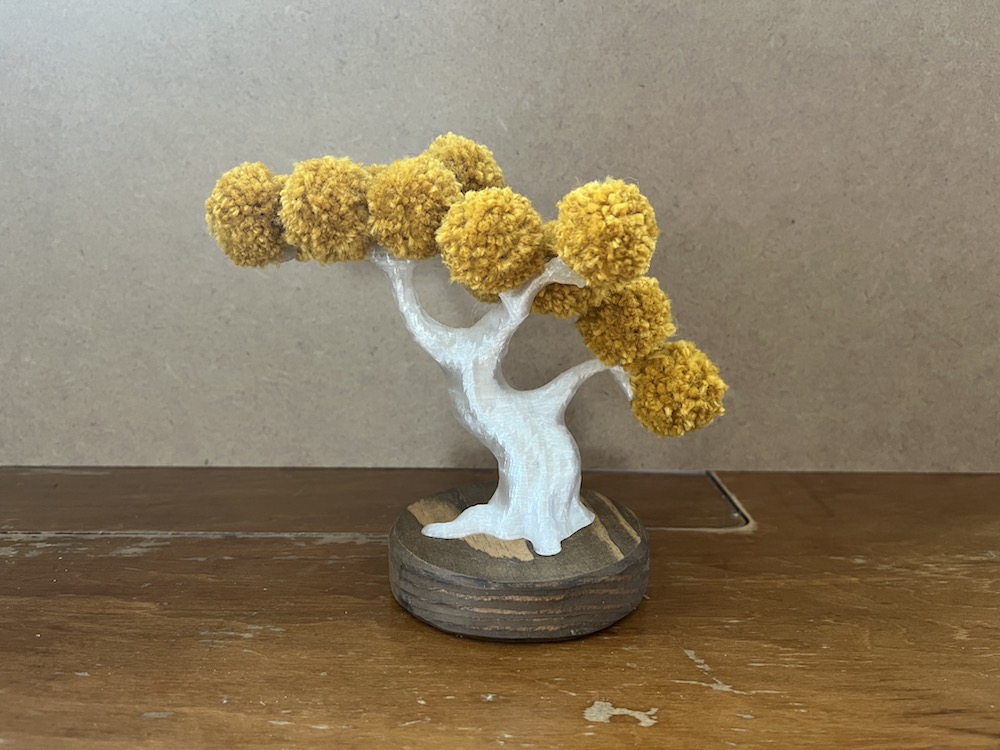
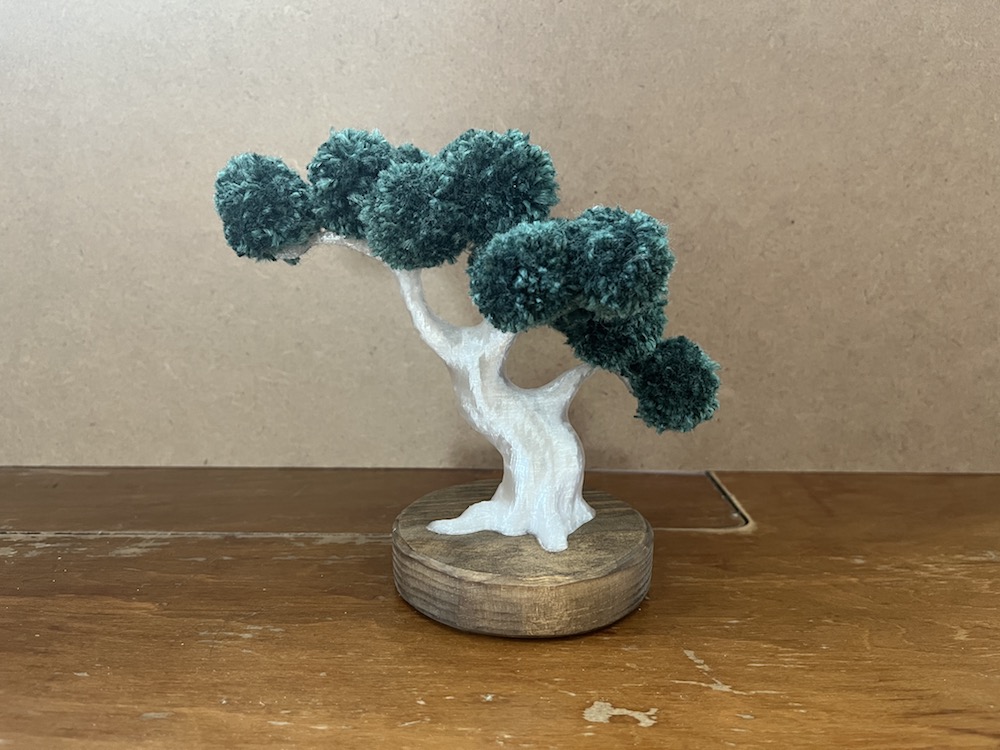
A miniature 3D printed bonsai tree embedded with LEDs under a canopy of pom-poms. Inspired by Dr. Seuss.
Materials & Tools
Tree
- Clear PETG 3D printing filament
- Addressable WS2812B fairy lights
- Yarn for pompoms
Electronics
- ESP8266 D1 mini
- 2-pin momentary button
- USB cable (I didn’t notice these cords were power-only. Oops.)
Base
- M3 nut and bolt to close the base box. (This was before I started designing boxes with an hinges & latches…)
- Piece of wood
- Router (I used a CNC router, but regular works too)
- Wood stain (if you want. I used pine, and stained with Minwax Dark Walnut)
- Orbital sander. Or just sandpaper.
Process
- Bonsai tree 3D model from Thingiverse
- Remix 3D model
- Design custom supports in Blender
- Slice & 3D print
- Spray paint
- Fill tree with LEDs
- Router wood base
- 3D print box with lid for components
- Solder
- Make pompoms
- Code
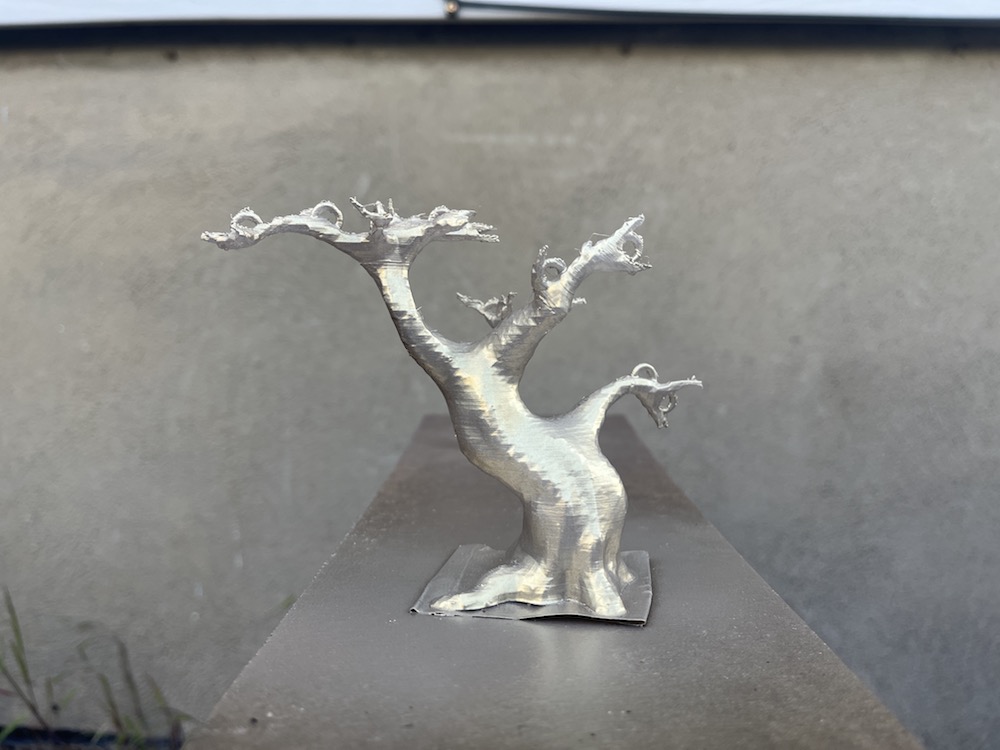
Bonsai tree 3D model from Thingiverse
I started out with this lovely 3D model I found on Thingiverse:

Remix 3D model
I used Blender to make some changes to the 3D model:
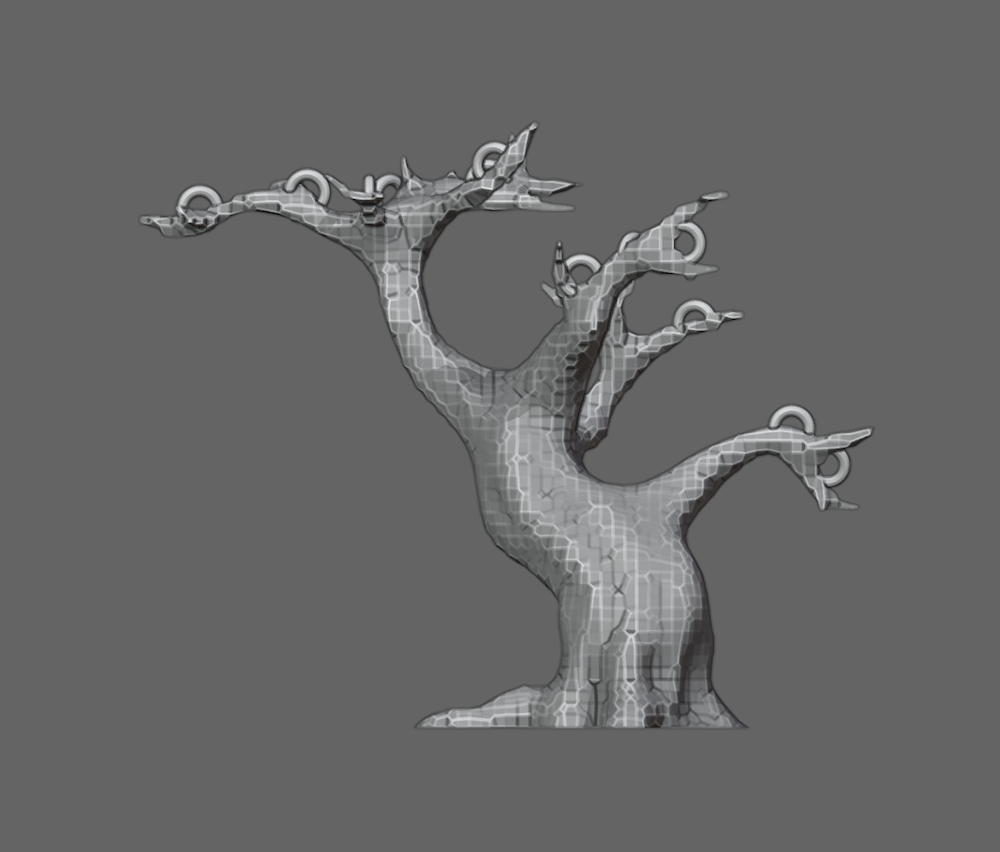
Changes I made to the model:
- Applied a remesh to reduce the geometry complexity. Here’s what happened:
- Made Blender run faster on my outdated Macbook.
- Lost the pointier branches, but those will be hidden by pompoms anyway.
- Lost the bark texture, but this tree doesn’t need to look real.
- Slightly inflated the bottom of the trunk to get less of a steep angle for 3D printing.
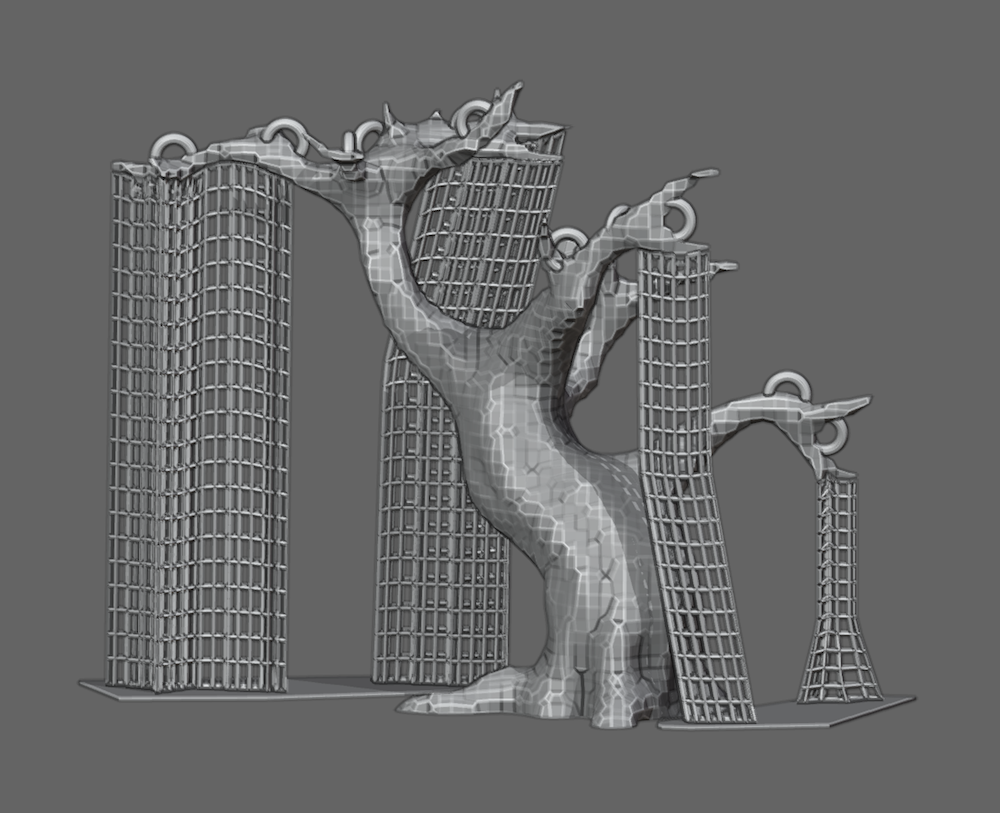
- Made the trunk hollow with 2mm thick walls. Then in the 3D printer slicer software (Cura) I set the infill to 0% so that the inner and outer walls of the trunk would print separately with empty space between, (as shown in the screnshot below). I did this to better diffuse the LEDs.
- Added loops to branches to tie pompoms to.
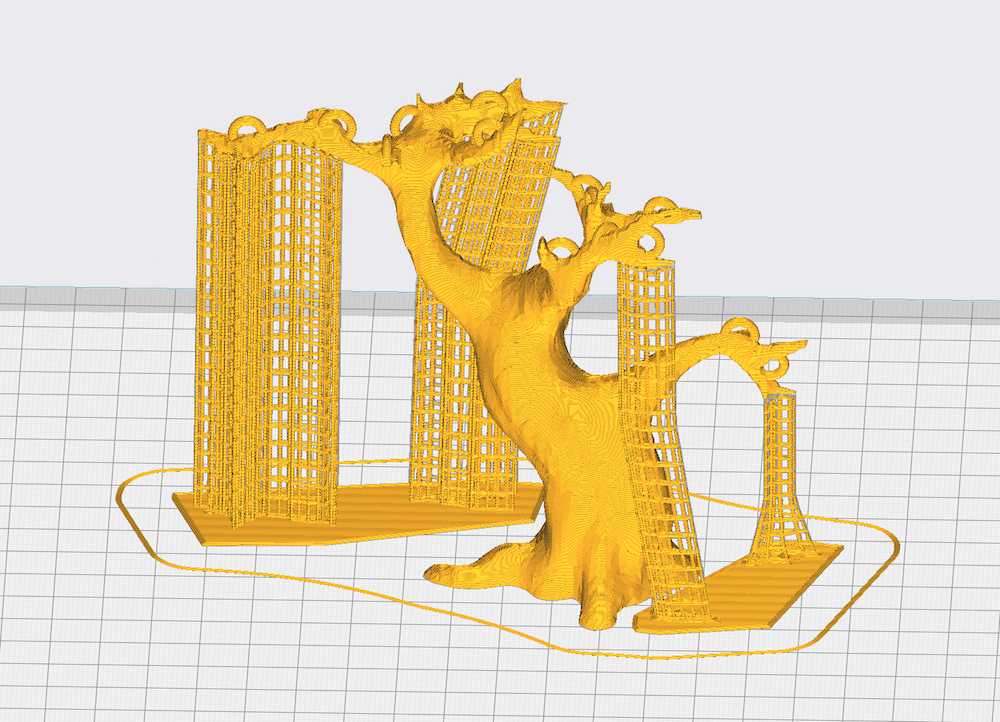
Design custom supports in Blender
The 3D printing slicer software (Cura) auto-generates supports, but they seemed excessive… it also tripled the amount of filament compared to the tree alone! Designing my own supports sounded way more fun anyway. I designed them in Blender using the Wireframe modifier. They worked beautifully. I think you can also do stuff like this with Meshmixer, which doesn’t seem available for Mac users.
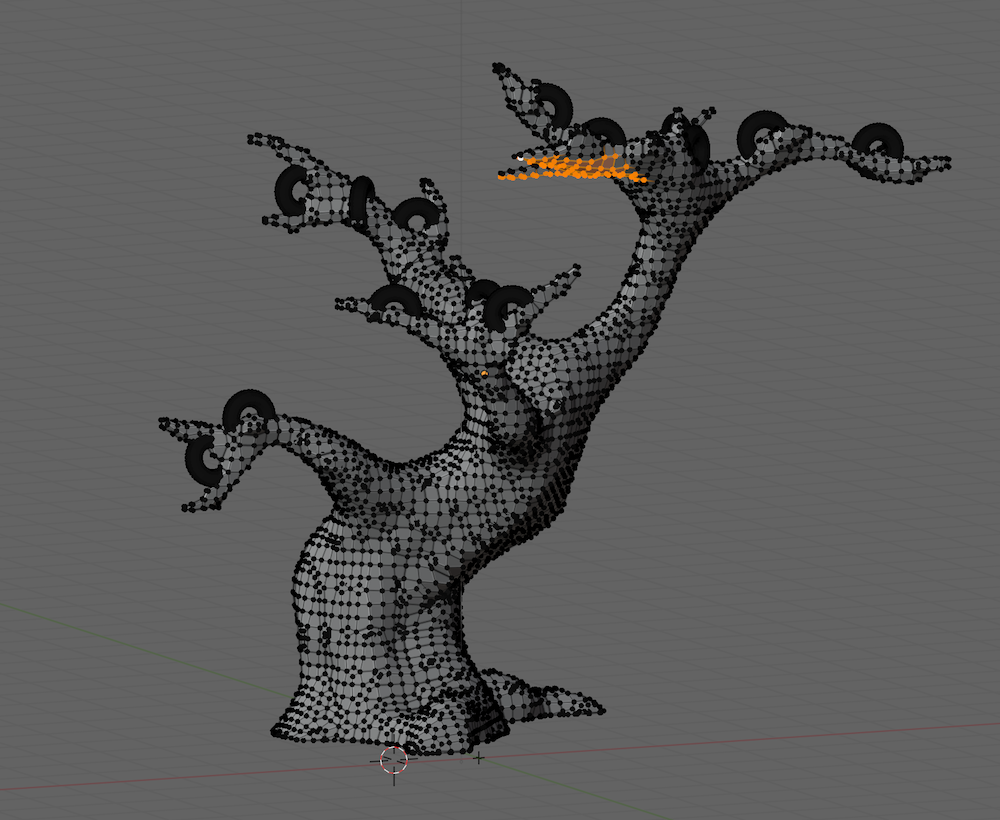
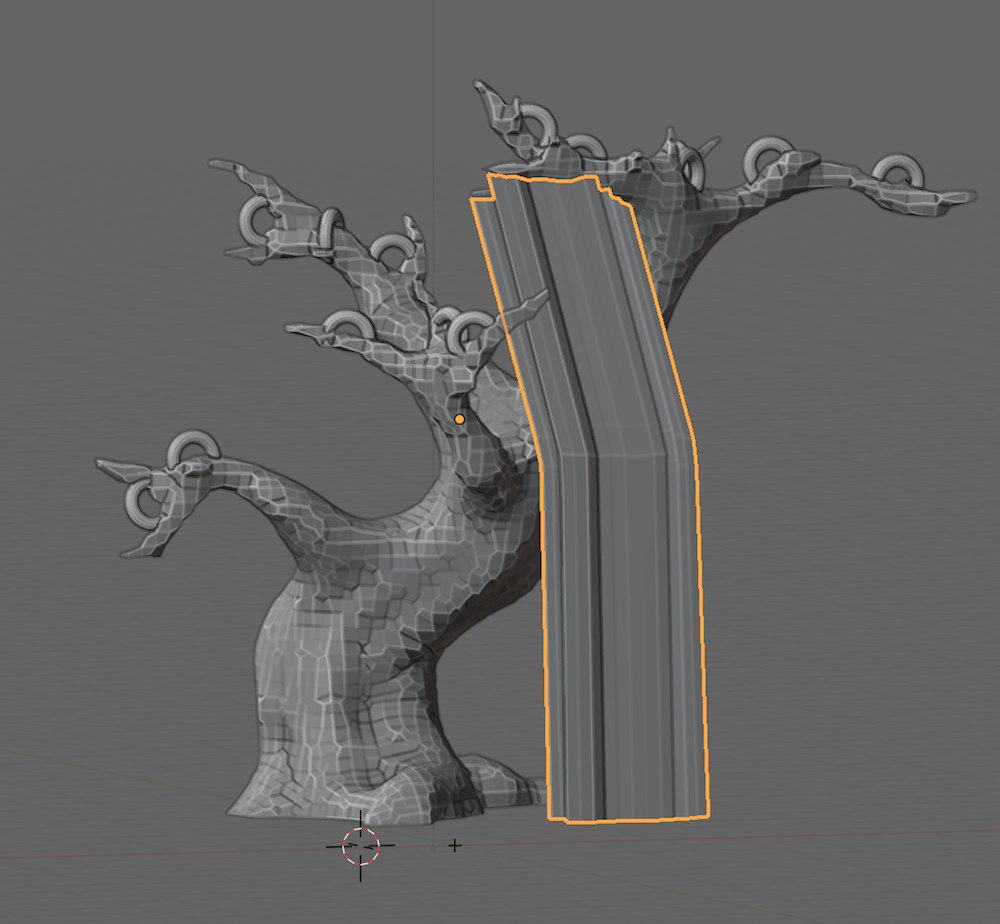
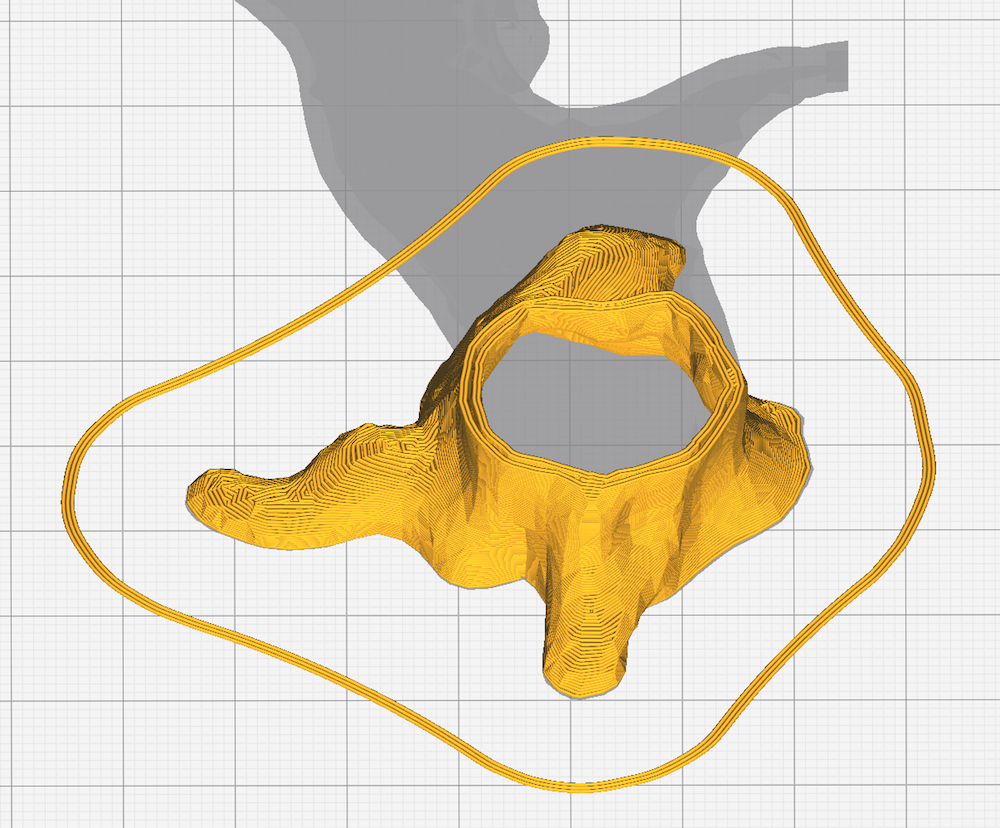
How I made these custom lattice supports in Blender:
- In edit mode, select the vertices you want supported (Image 1)
- Duplicate those vertices, place them down -0.4mm (
shift-d z -0.4) - Pop the duplicated vertices to a separate object (
p) - Extrude them down to align with the bottom of tree (
e) - Select the bottom vertices, make them all flat at z=0 (
s z 0) - Now you have a column (Image 2). In edit mode, loop cut the column 10-20x (
ctrl-r 10) - Move vertices that intersect the tree out of the way of the tree
- Apply Wireframe modifier, thickness 1mm / offset -1
- Make a skirt for the lattice to increase build plate adhesion
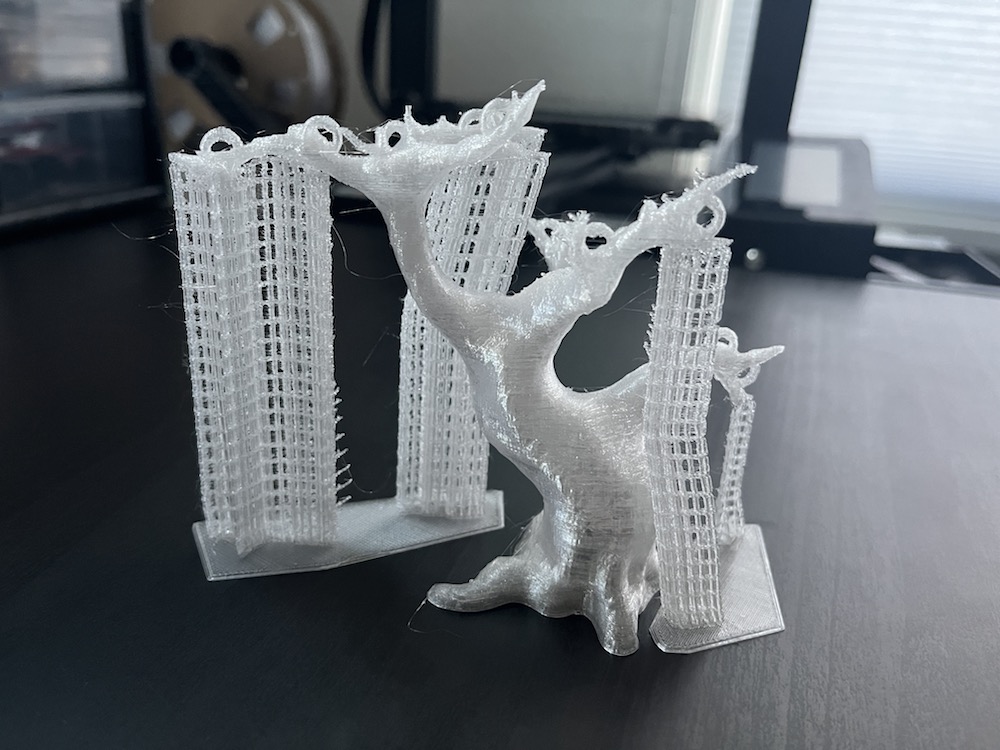
Slice & 3D print
This print used 28g filament ($0.56) and took 9hr 24min to print.
Spray paint
I bought a custom clear and gold spray paint blend from an automotive paint supplier. It’s super shiny and sparkly but since it’s clear it needs an opaque base coat to really stand out. For the base coat I used an opaque gold.
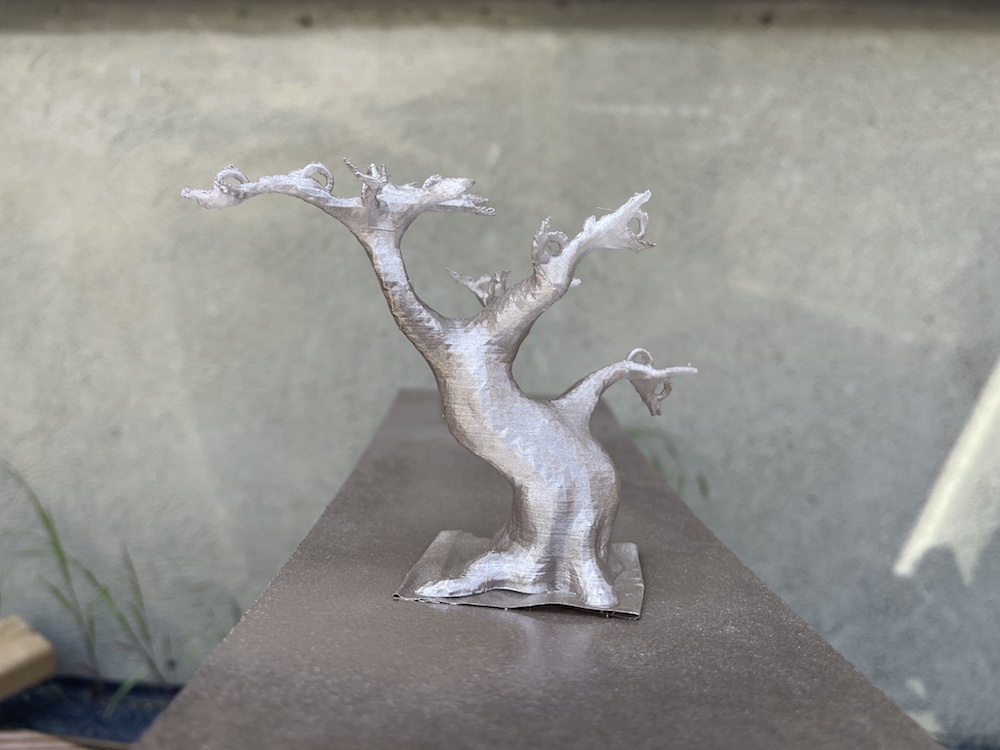 Base coat: Standard gold spray paint. (A little shiny, but not shiny enough.)
 2nd Coat: Custom clear & gold blend I got at an automotive paint supplier. (So shiny!)
A thin coat of spray paint does not block light from passing through the clear PETG filament, although it is a bit less bright, and is a bit blotchy if you look closely.
 No spray paint, just clear PETG
 Gold spray paint over clear PETG
Fill tree with LEDs
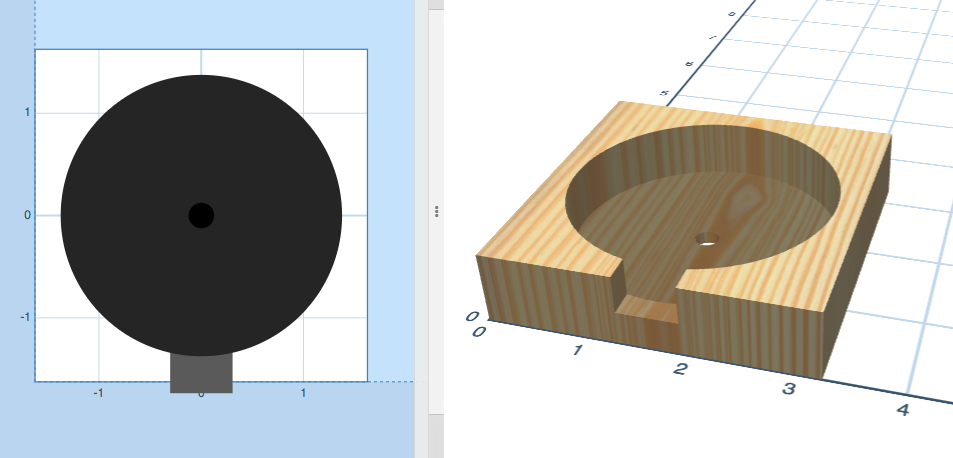
Router wood base
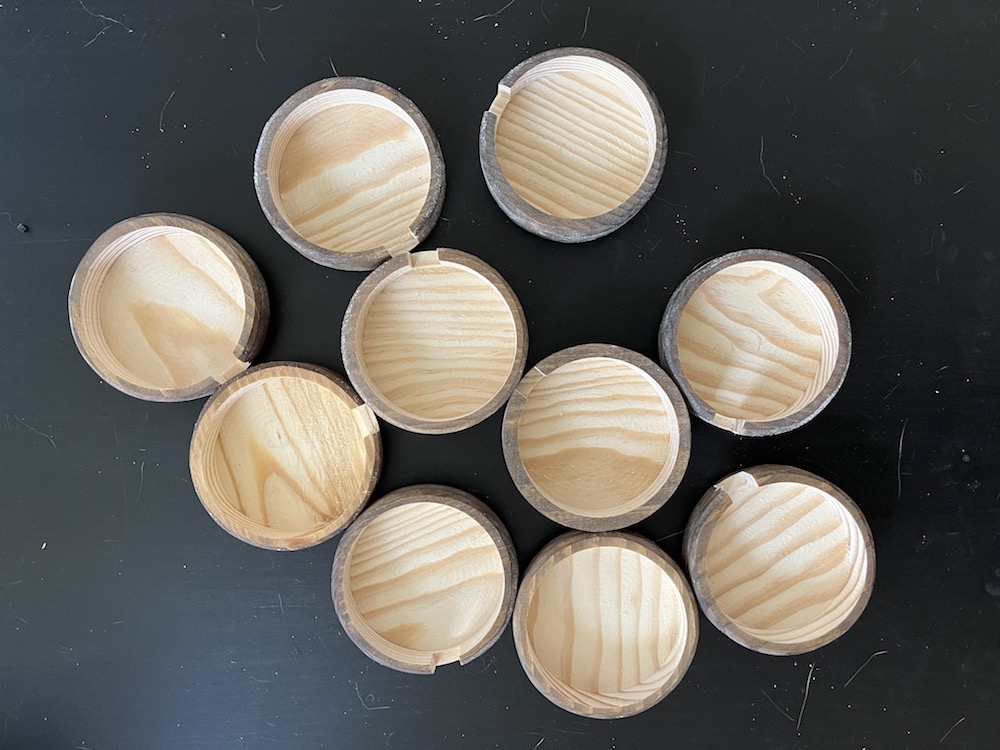
I used a CNC router for this, but a regular router works too.
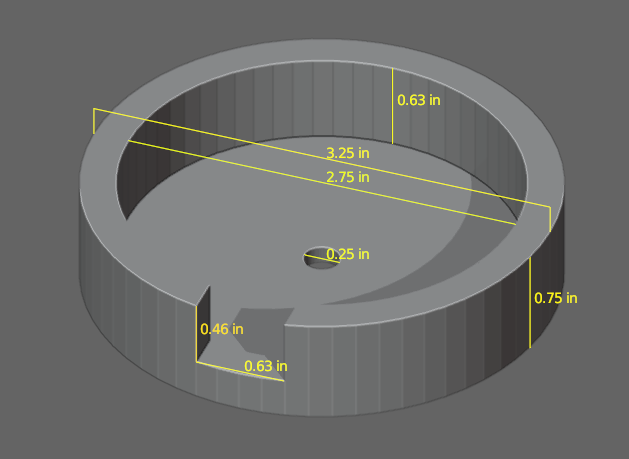
3D print box with lid for components
For this design, I printed a base box and lid separately. This was before I knew how to design and 3d print boxes with hinges and latches. The way this box stays closed is with two grabby tabs on one side and an M3 nut and bolt on the other. In the photo below you can see a small nut glued into a “nut pocket” with Elmer’s glue. And then the lid has a recessed hole for the bolt to nestle in.
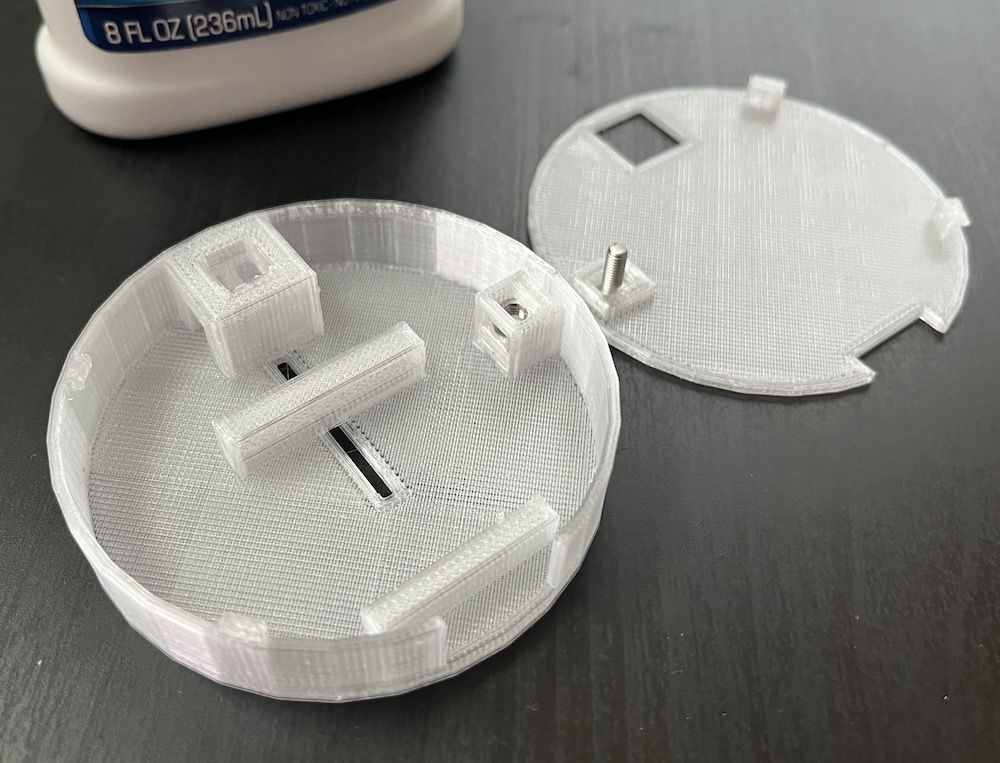
I designed this box and lid so that it can be printed without supports. You can get the STLs here.
Solder
Before soldering, don’t forget to:
- Label the power and ground wires coming out of the tree. Once the tree is glued down, you won’t be able to see the ground indicator on the LED. (I forgot so many times. Luckily, you can measure the resistance between each of the three wires with a multimeter and figure out which is which.)
- Sand the wire insulation. Because these are fairy lights, the wires have a thin coating of insulation.
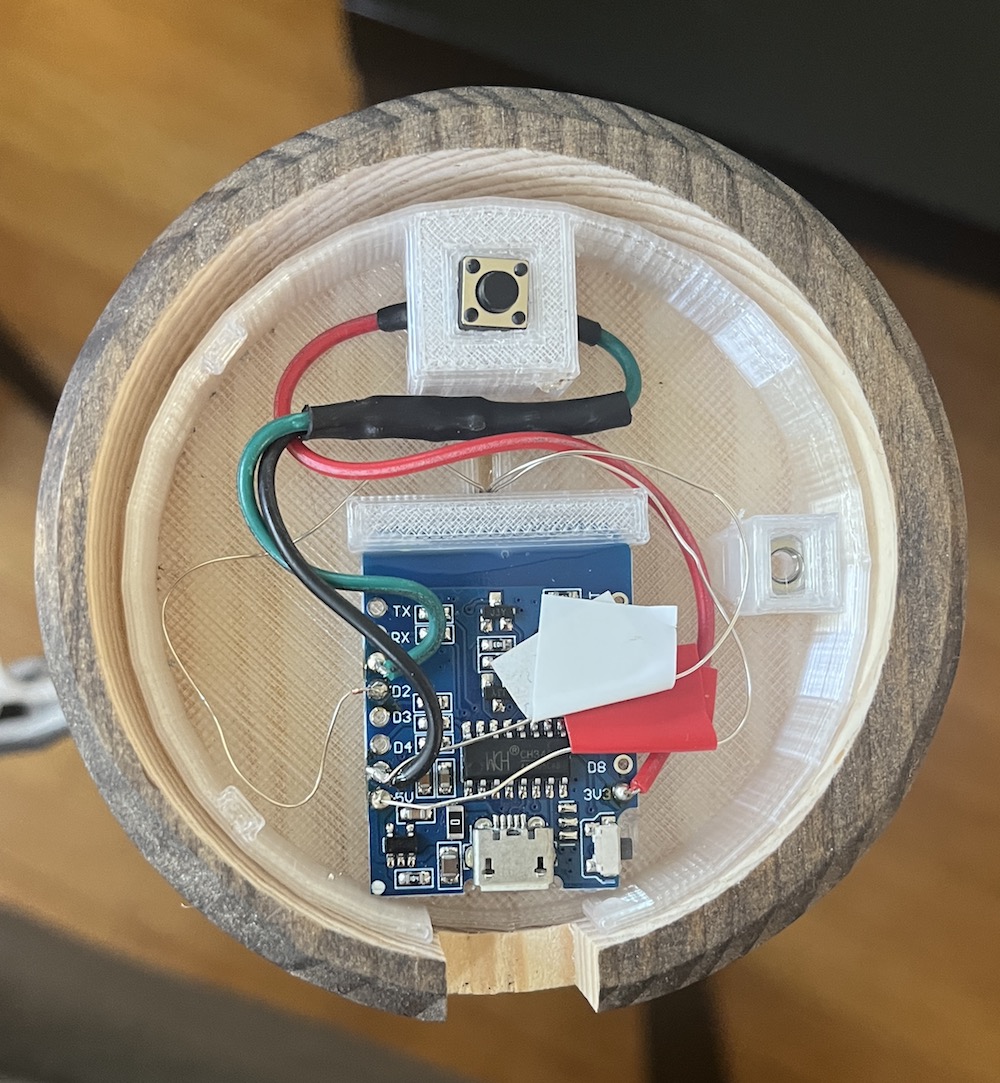
Schematic

Make pompoms
I learned how to make mini pompoms out of yarn using a fork from this YouTube video.
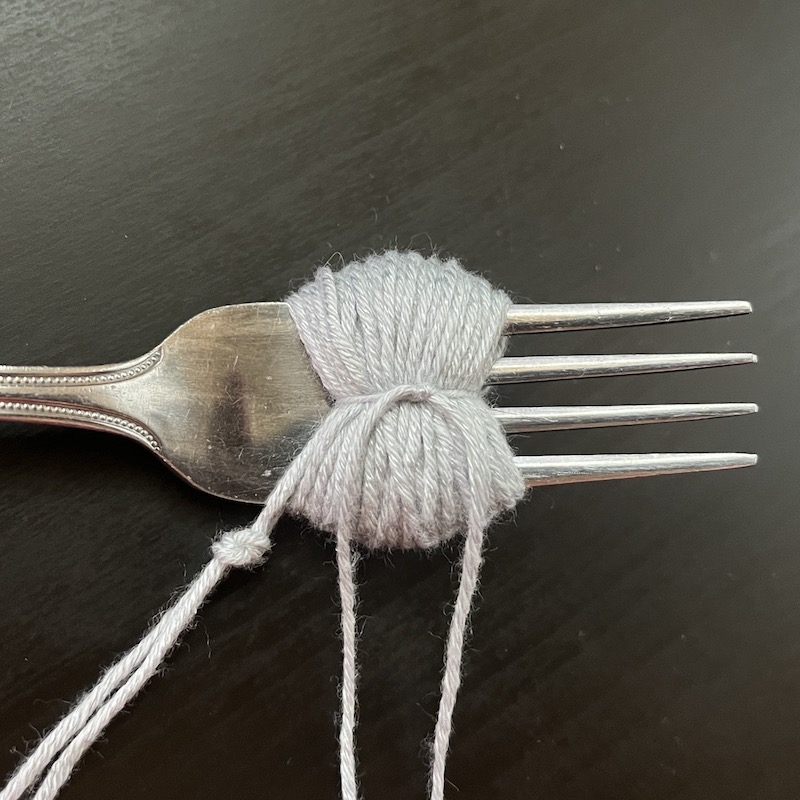 1. Wrap around fork. Tie around middle slot.
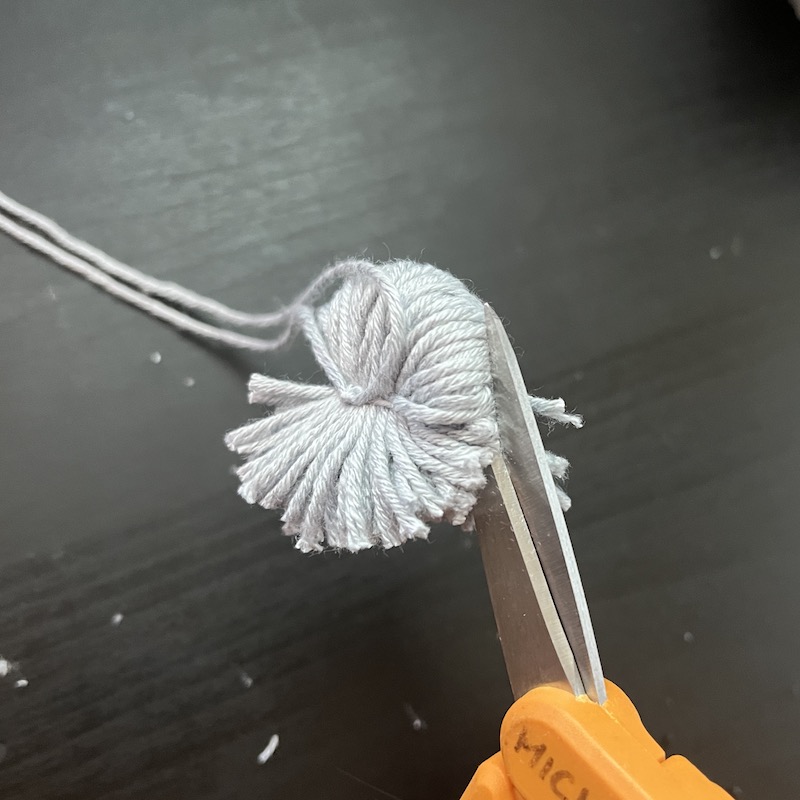 2. Cut loops along circumference.
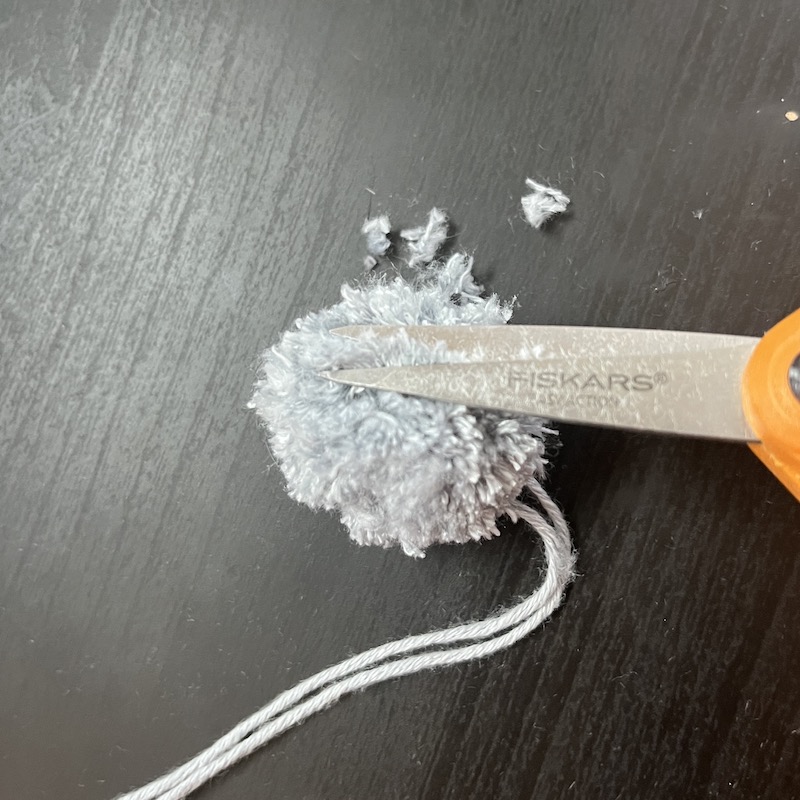 3. Trim uneven ends into round shape.
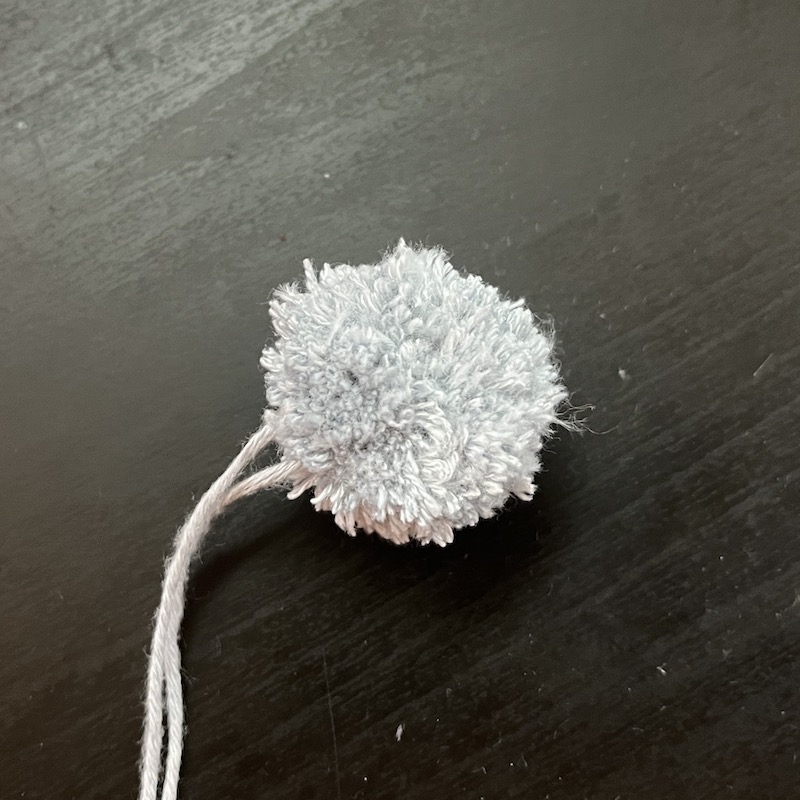 4. A pompom!
Code
The LEDs have two modes: solid color and twinkle. The button on the bottom of the tree changes the mode. Both modes slowly cycle through several color palettes.
The twinkle mode code is adapted from FastLED’s TwinkleFox algorithm.
In solid color mode, the color slowly transitions between colors in the active color palette. If you imagine a color palette as a spectrum, the color being displayed oscillates between each side of the spectrum with a sine wave:
void solidColorFade() {
  int paletteIndex = beatsin8(10, 0, MAX_PALETTE_INDEX);
  for (int i = 0; i < NUM_LEDS; i++) {
    leds[i] = palette.getColorFromPalette(paletteIndex);
  }
}

Thanks for reading!