Sound Reactive Rib Cage
September 2022
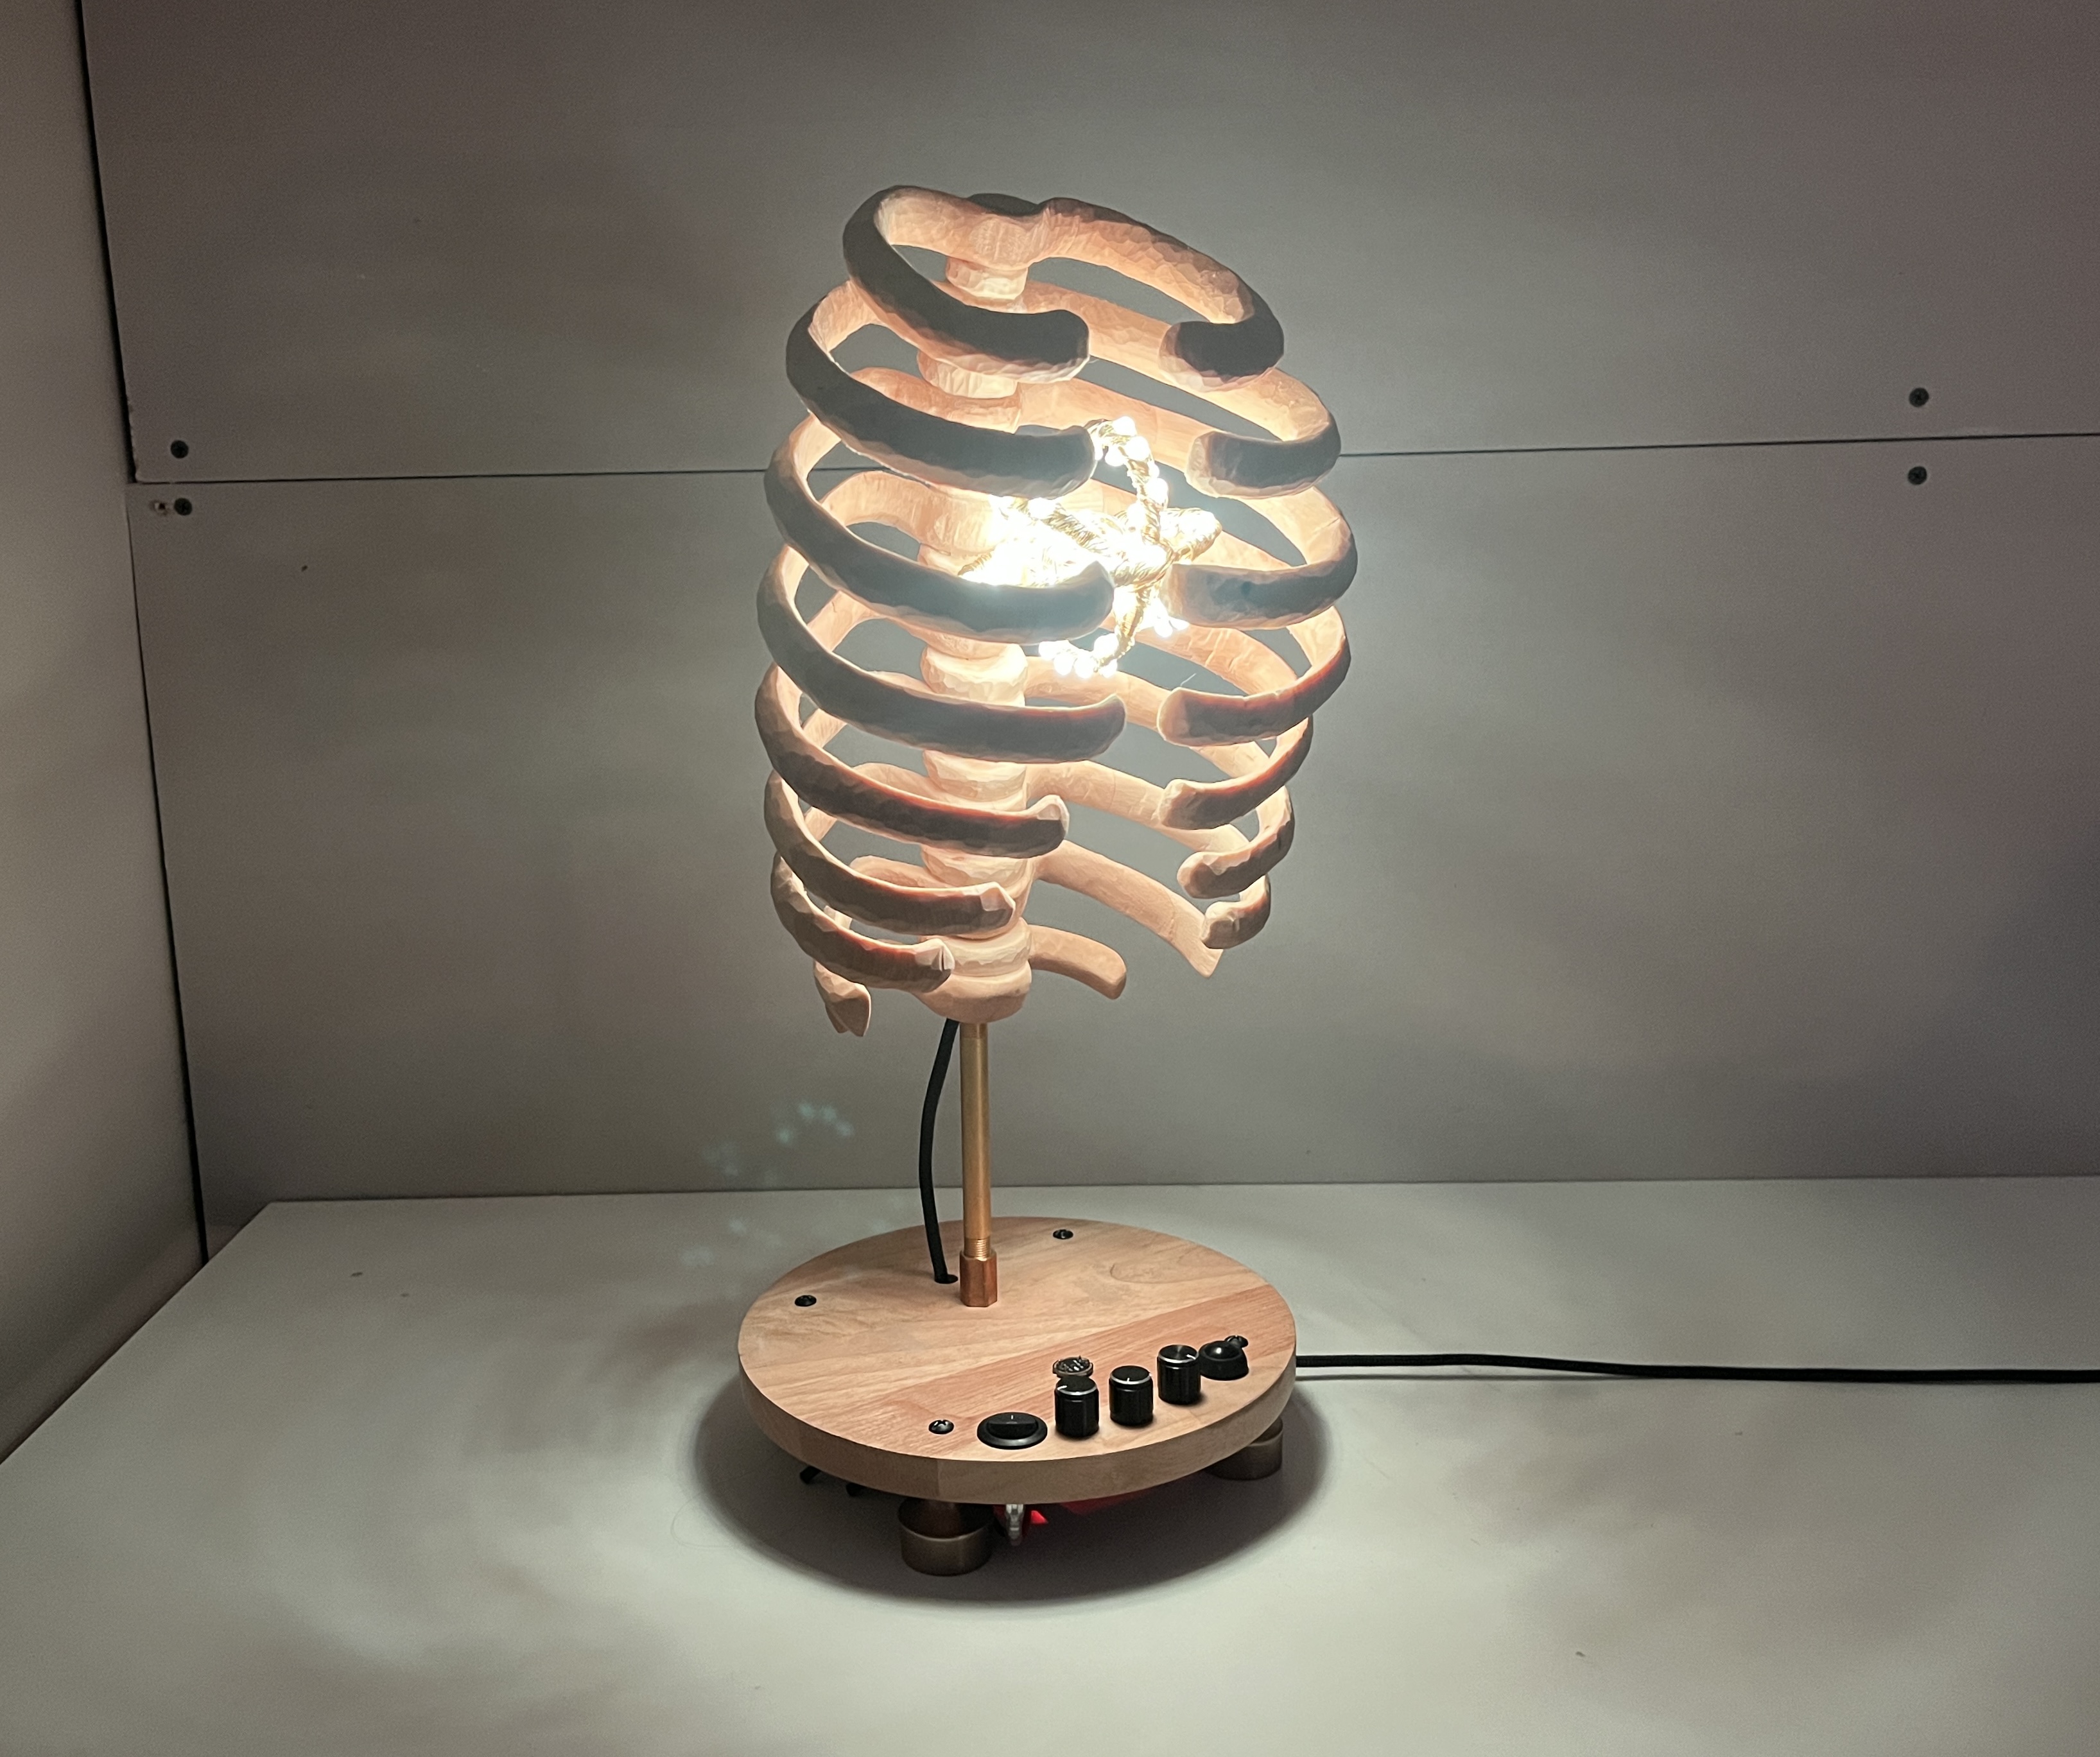
A hand-carved wooden rib cage with a heart of LEDs. The lights have several modes including a sound reactive heartbeat to the music. Inspired by inner beauty and oneness.
Materials & Tools
Ribs & LEDs
- 3/4” 8x10 basswood sheets for the carved ribs and vertebrae.
- Wax wood polish
- 1/4” steel rod - runs throughout spine for support.
- Adafruit Fixed Address NeoPixel LED Fairy Lights
- Solid core copper wire for mounting the atom to the ribs and for the internal atom structure.
- 22 gauge garden wire for wrapping around solid core copper wire to make it look nicer.
Base
- Round hardwood disc for base. I used a piece of an old lazy susan I bought at Savers!
- 4” Brass fitting - the longest brass tube between rib cage and base.
- Brass coupling - for screwing the longest tube onto the base.
- 3/4” Brass fitting - short brass tube that goes through base and screws into the coupling.
- Brass cap - screws into the short tube underneath the base.
- Cabinet knobs - 4 feet for base.
Electronics
- ESP32 development board
- INMP441 microphone
- Rocker switch
- Potentiometers
- Button for cycling through light modes.
- 470k ohm resistor
- 22 gauge wire. I had this leftover from a past project, and I lost the link!
- Heat shrink
- 3 pin wire connectors
- M2 machine screws and nuts for mounting ESP32 board to base.
- Mount screw terminal block connectors - I am in love with these right now! They are such a great alternative to soldering wires directly to the board.
- Any 6’ USB cable with standard USB-3 on one end.
Tools
- Wood carving knife and leather honing strop for sharpening.
- Graphite paper for tracing shape of ribs onto wood.
- Jigsaw for cutting out the general shape of each rib before carving.
- Drill and/or drill press - I used a drill press for drilling holes in the spine, and a Ryobi battery drill for all the holes in the base.
- Router for digging out space under the base for the switch/potentiometers/knobs to mount to.
- Sandpaper
- Wood glue for glueing broken ribs back together.
- Super glue for glueing the ribs and vertebrae together.
- Wood filler for filling in accidental gaps in the vertebrae, whoops.
- Soldering iron
- Solder
Process
- Use 3D model of a rib cage to find shape of each rib
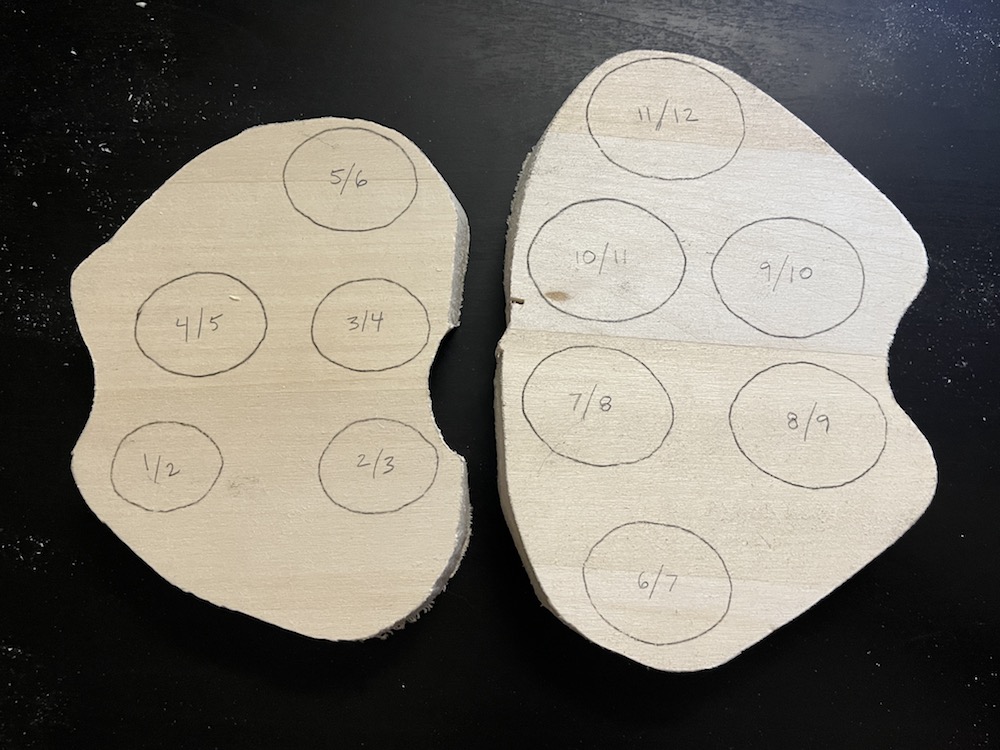
- Transfer rib outlines onto wood with graphite paper
- Cut out general shape of ribs with jigsaw
- Carve ribs to refine shape
- Add texture to the ribs
- Cut out & carve discs for vertebrae
- Assemble ribs onto steel rod with super glue
- Add wax polish
- Build base and mount all electronic components
- Mount rib cage to base
- Arrange LEDs, attempt 1: “the bundle”
- Arrange LEDs, attempt 2: “the atom”
- Research code for sound reactive mode
- Code all the patterns
- User guide
- Video
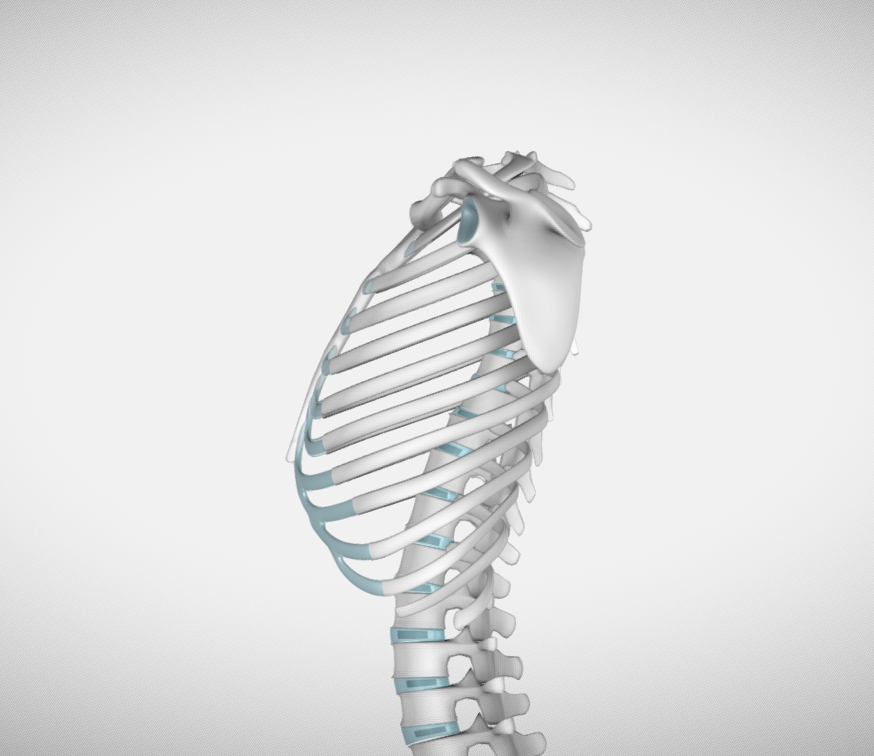
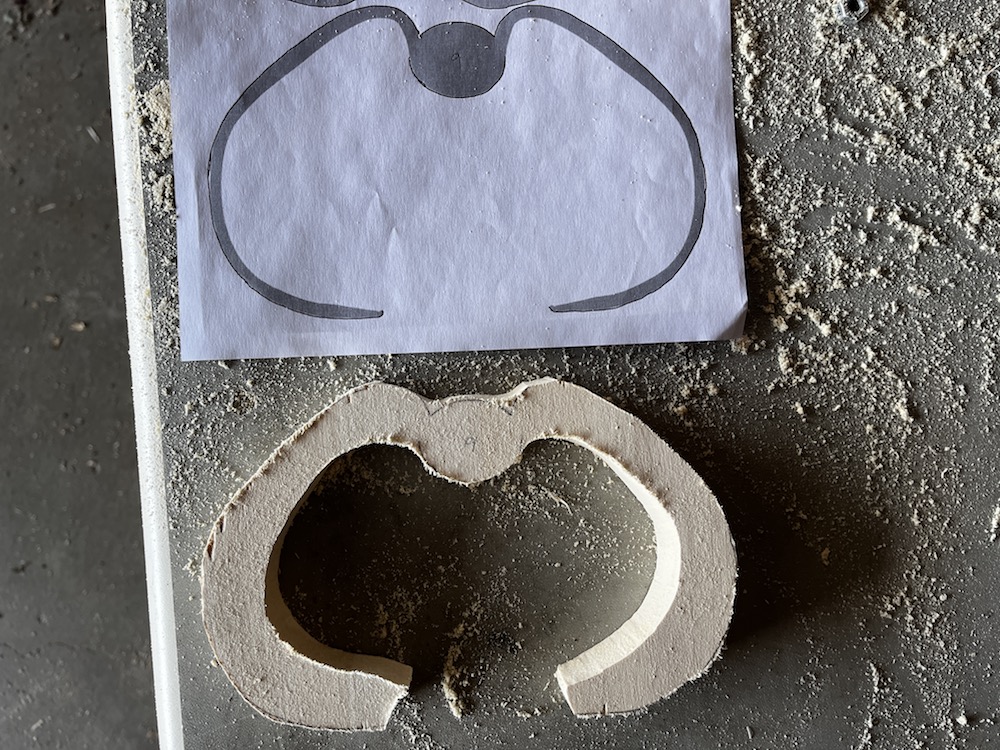
Use 3D model of a rib cage to find shape of each rib
I chose this 3D model of a rib cage for its shape and because from the side view, most of the ribs are pretty much parallel. That was the key to support my whole assembly plan: to carve each rib individually out of a flat sheet of wood, and stack them at an offset like a staircase, pointed downward at a 20 degree angle.
The gif below shows the result of how I extracted the outline of each rib individually. I took a screenshot of the 3D model from a top-down view, imported it into Procreate on my iPad, and traced each rib onto a separate layer. Then I arranged the traced ribs as concisely as I could into six 8” x 10” areas to be transferred to the wood slabs.

Transfer rib outlines onto wood with graphite paper
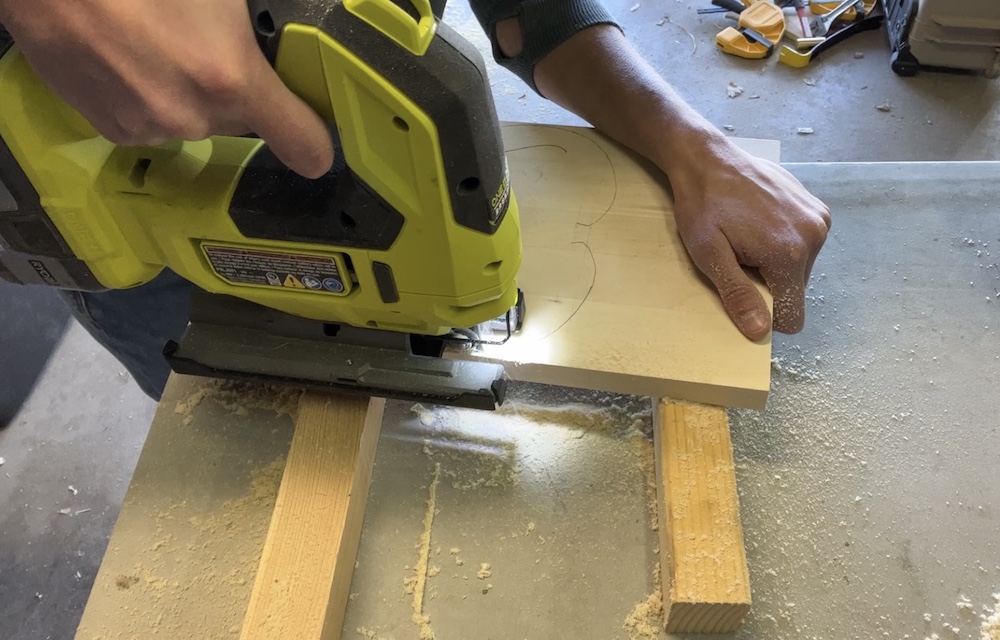
Cut out general shape of ribs with jigsaw
I have decided the jigsaw is my new favorite power saw. The chop saw used to be my favorite. But with the jig you can make SHAPES. As awesome as the jigsaw is, this process took some finesse, and I broke at least six of the ribs while cutting them out. Luckily, they all broke cleanly at an existing seam in the wood, so glueing them back together was no problem and you can barely see where they were glued.
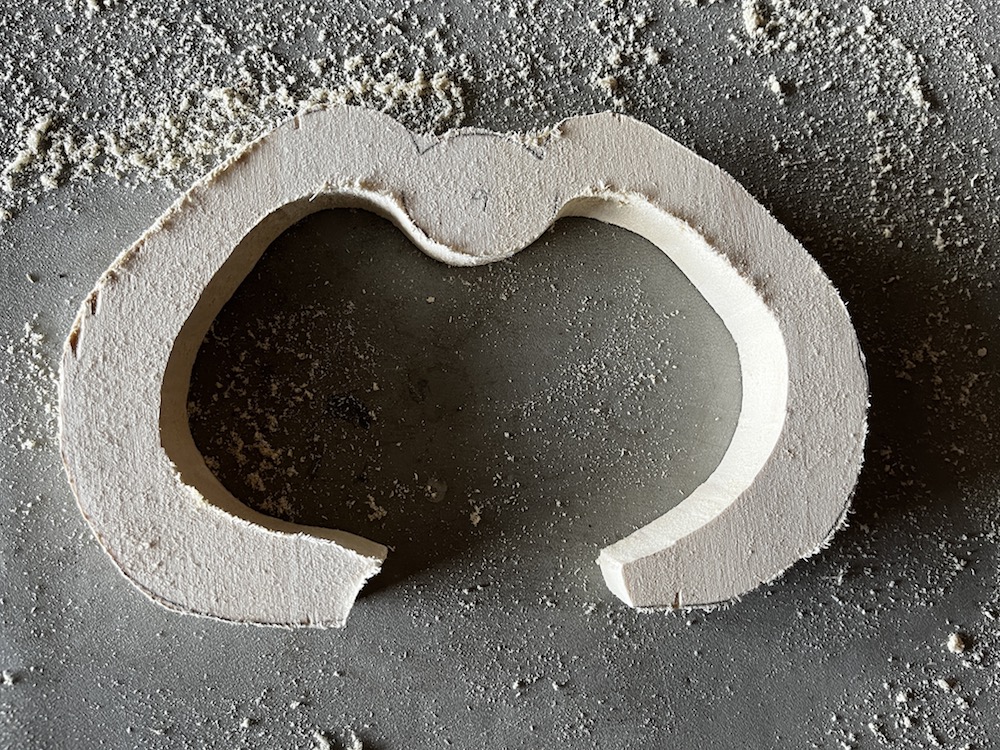
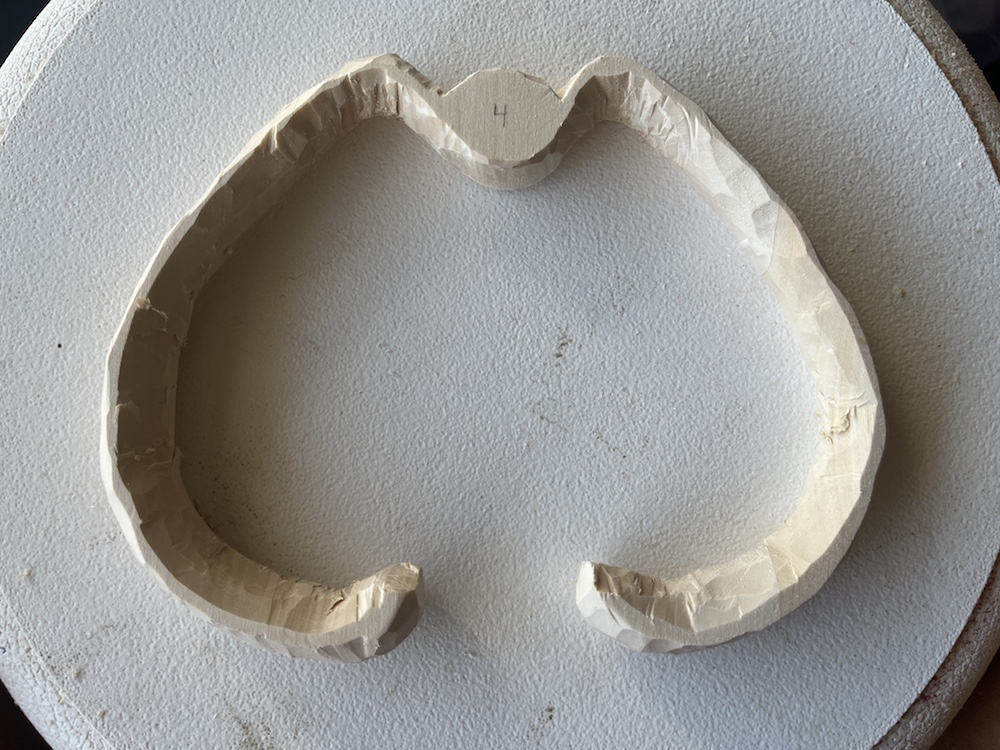
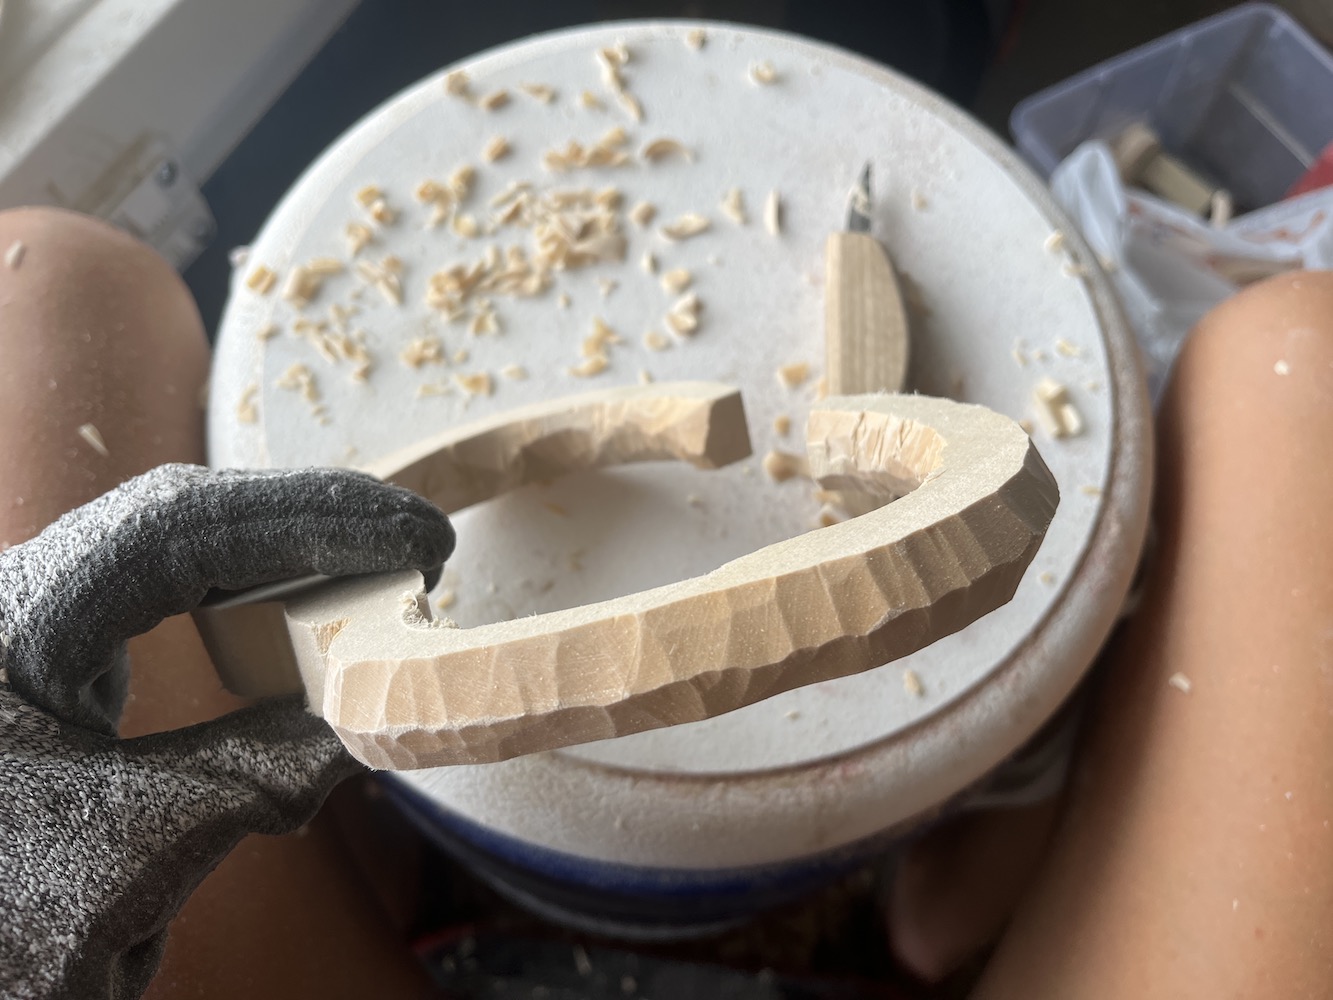
Carve ribs to refine shape
The outline I drew onto the wood was the outer edge of the rib, so most of the carving work consisted of removing material from the inner surface of the rib, and then shaping/texturing the outer surface.
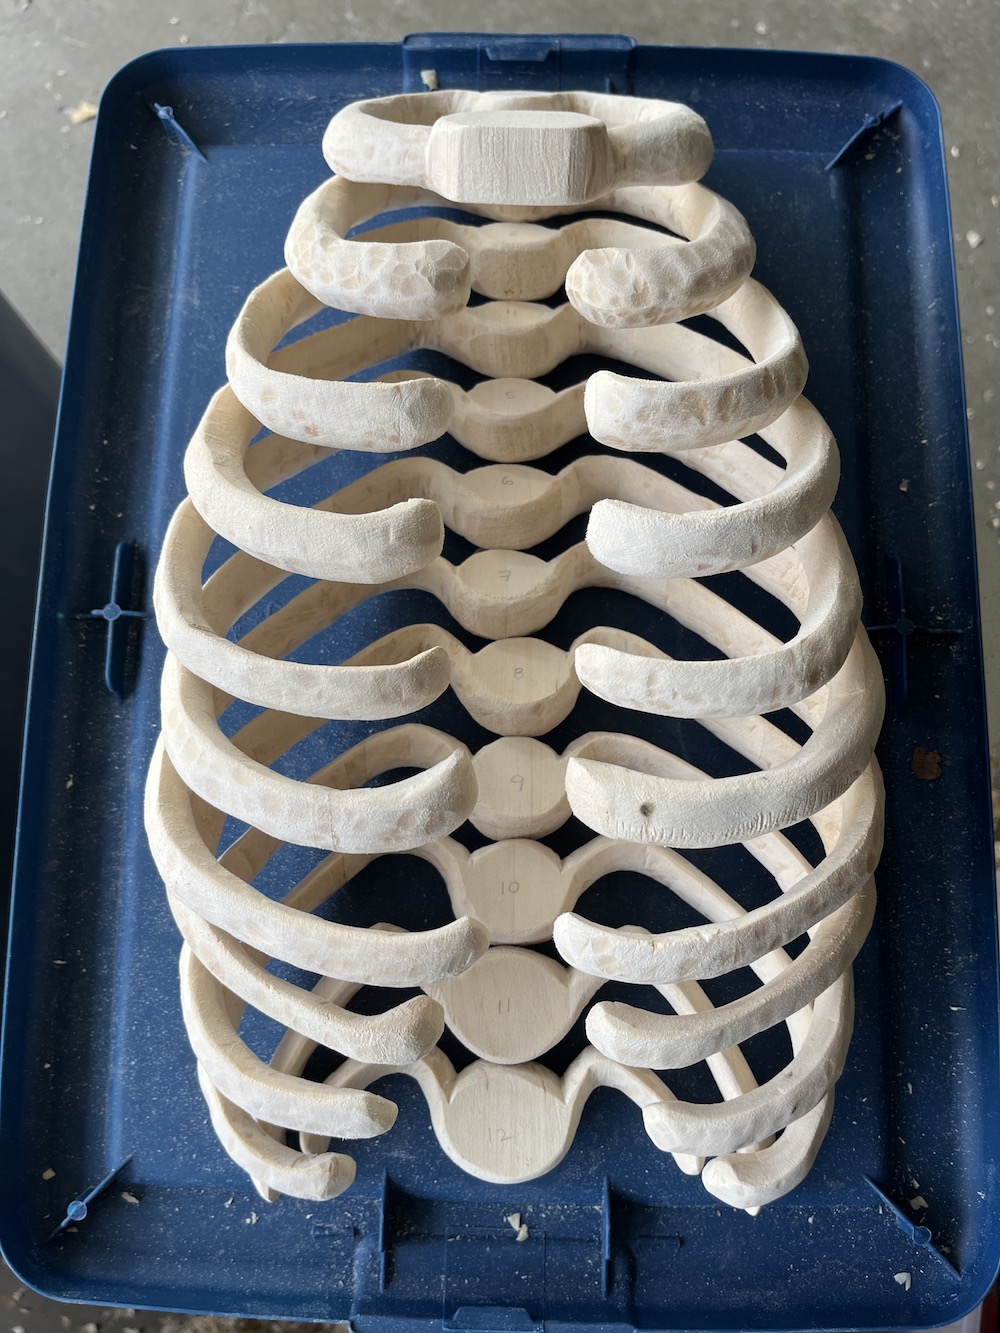
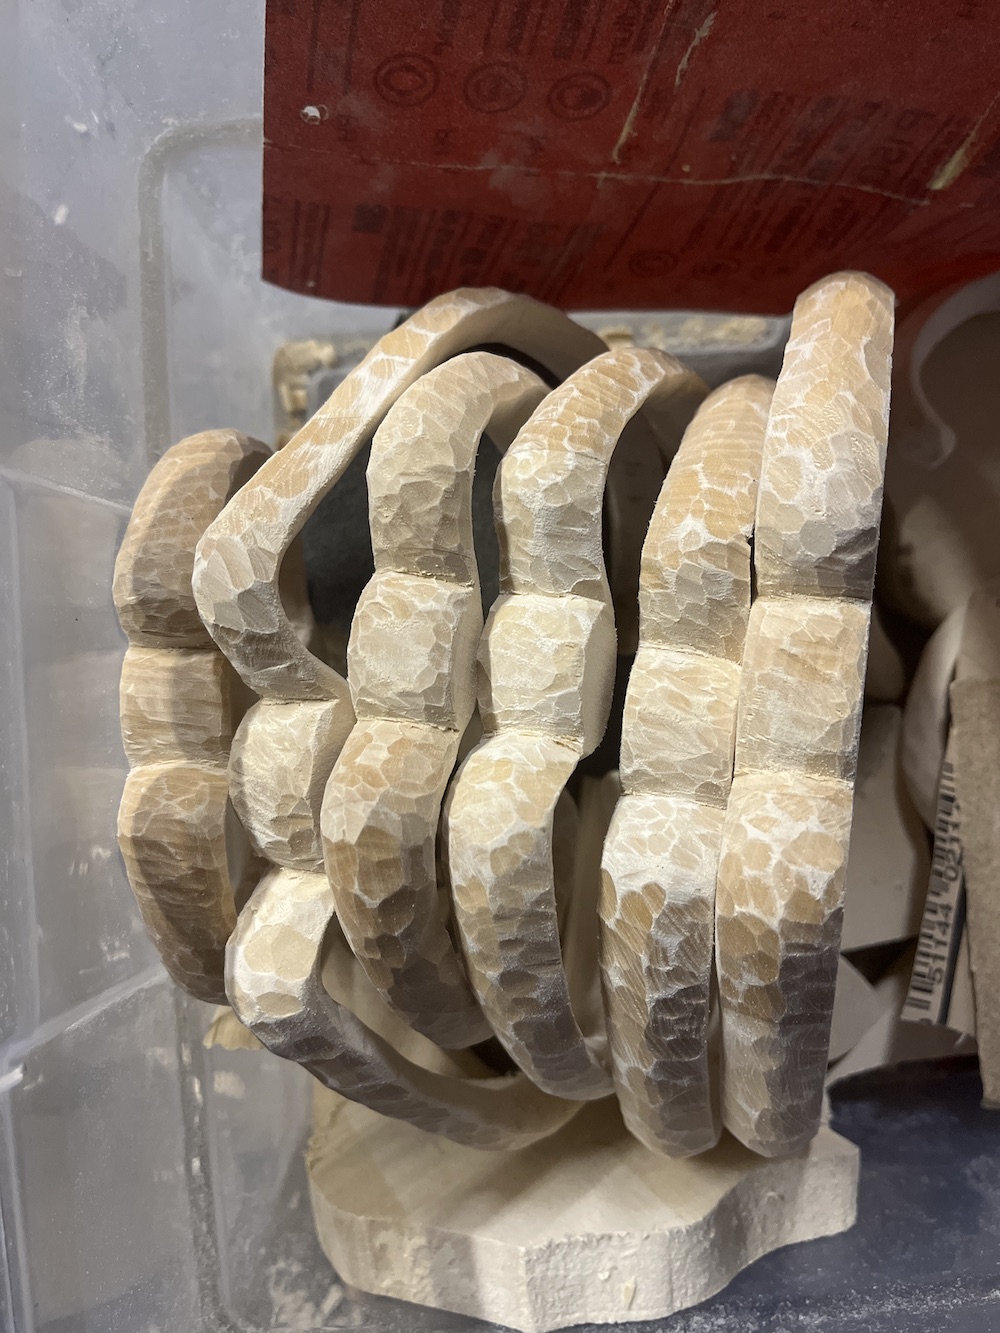
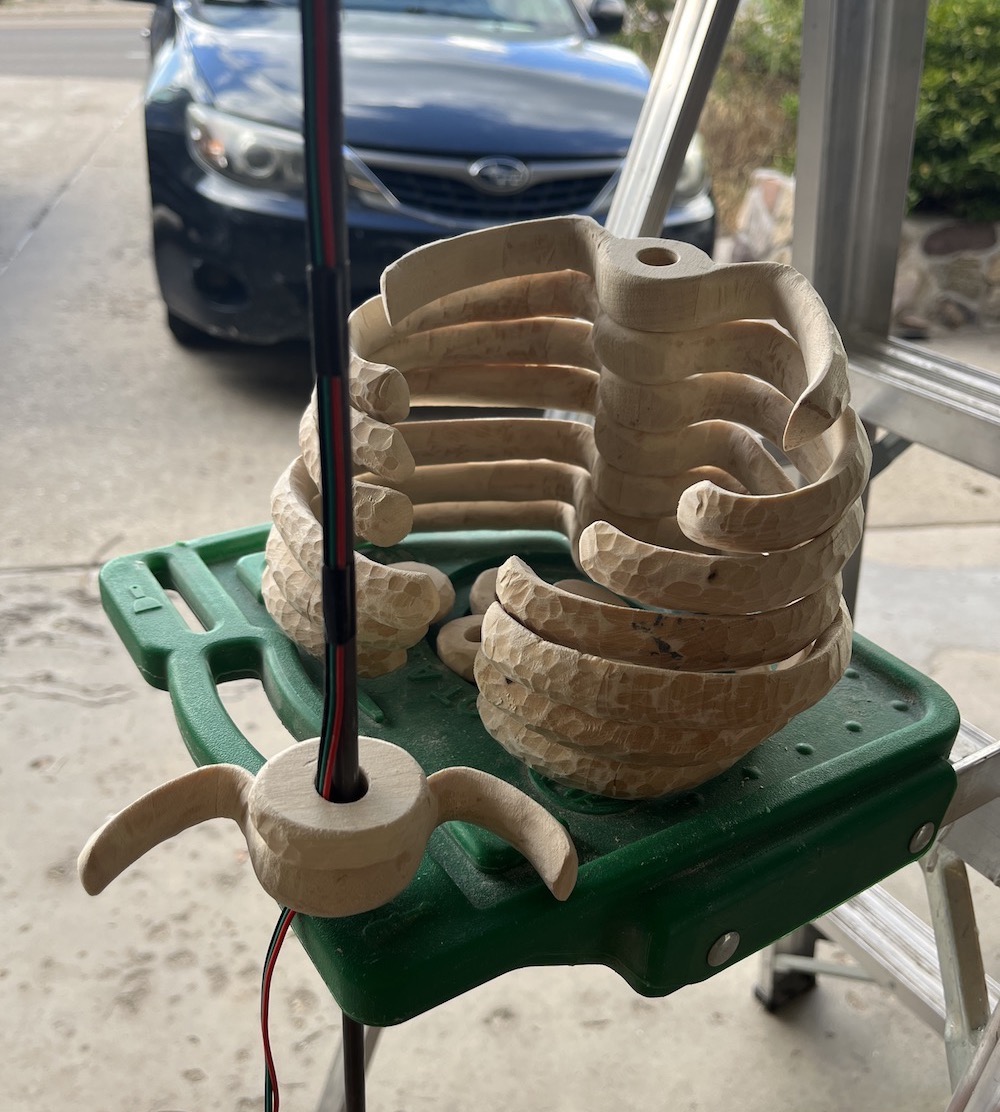
Add texture to the ribs
At first I sanded all the ribs down after carving them, as shown in the photo below of all the completed ribs. But after I studied this photo and got some feedback from friends, I realized I liked the bumpy look on Rib 2, the second rib down in the left photo, where I’d gotten lazy with sanding and left some of the carving texture. So I went back in with the carving knife and carved the texture back into each rib.
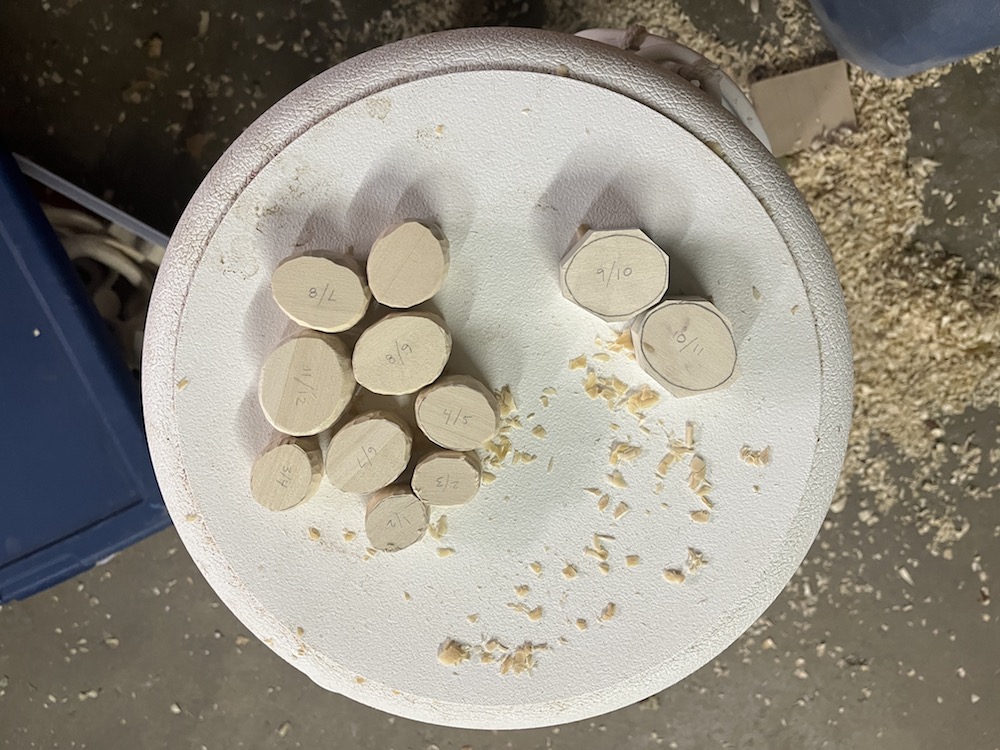
Cut out & carve discs for vertebrae
Also trim the vertebrae down to half the thickness of the ribs, about 3/8” thick.
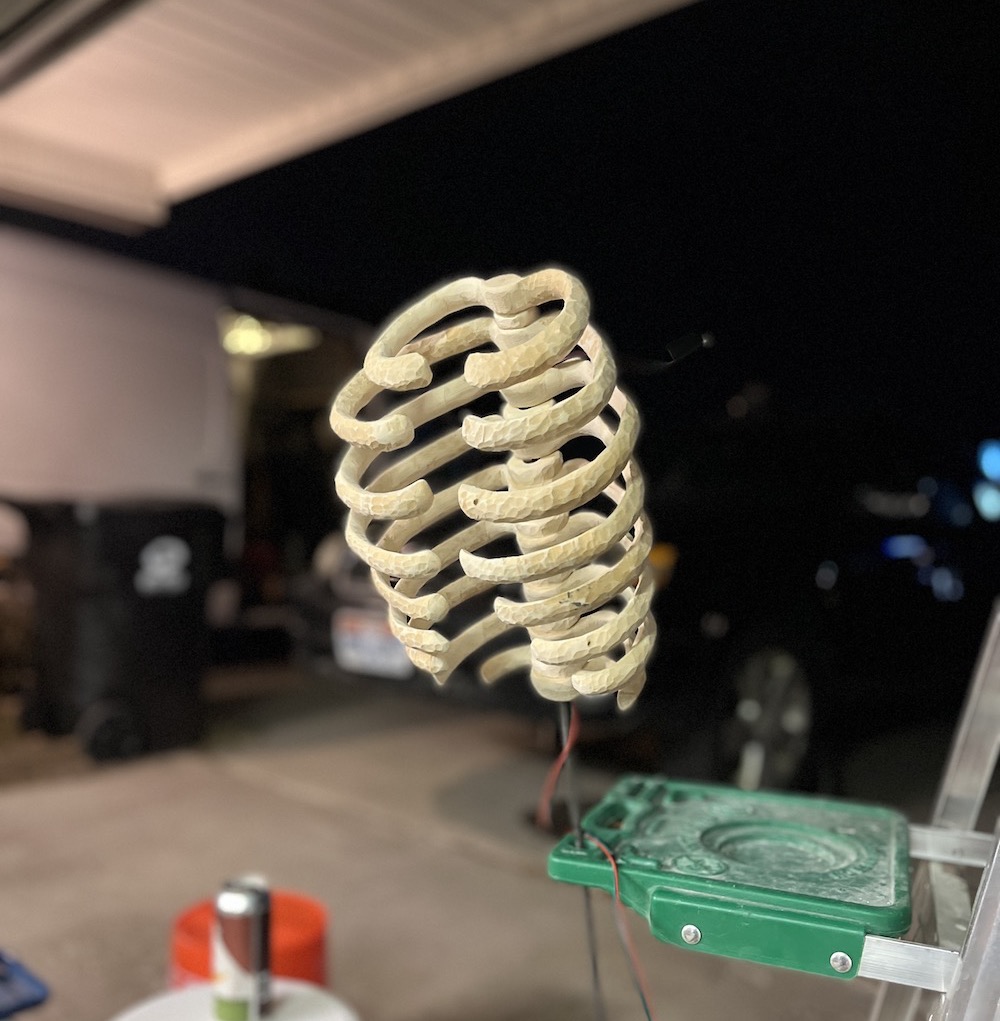
Assemble ribs onto steel rod with super glue
This part was scary/dramatic. I drilled a 1/2” hole straight the center of each rib and vertebrae and super glued them together on the 1/4” steel rod. Having the 1/2” hole larger than the 1/4” rod allowed each piece to angle downward, and I even added more angle to most pieces by sanding the holes as I stacked them.
Design changes
I created 12 ribs originally, (to match the real amount humans have) but as I was assembling it, it was getting taller than I wanted it to be, so I started skipping ribs, and ended up with 9 total. I also planned for there to be a full sternum, but I never added it because I liked the open look.
Add wax polish
I chose wax after sampling two different wood finishes: Mineral oil, (which didn’t absorb evenly - it appeared darker in some areas and also slightly muted the texture), and Howard’s wax wood polish (which added a lovely matte shine, darkened everything pretty evenly, and smelled nice)
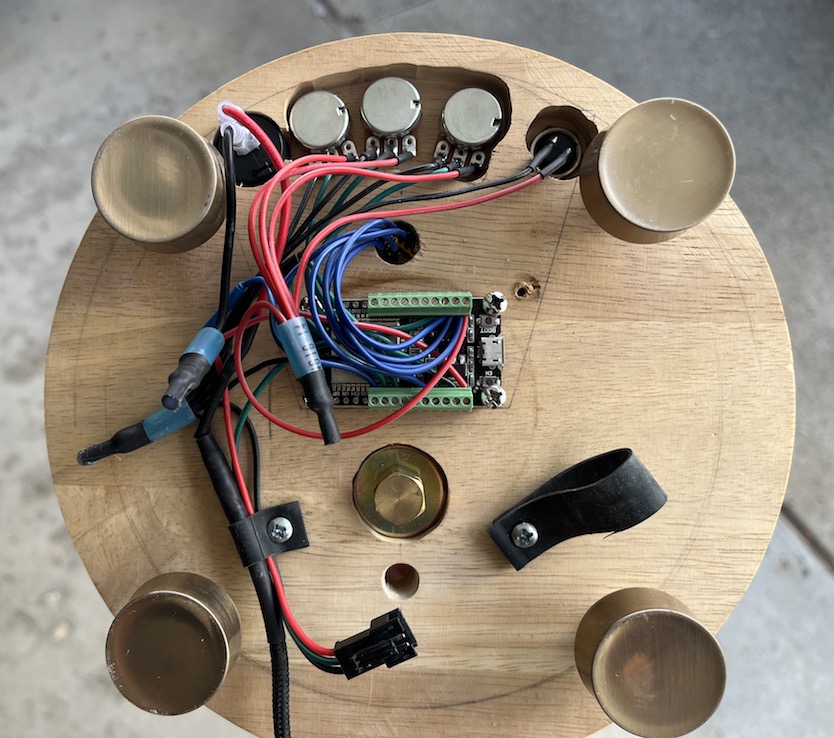
Build base and mount all electronic components
My plan was to buy an old cutting board at a thrift store to cut a circle out of for the base, but I found a lazy susan at Savers that was already the perfect size circle.
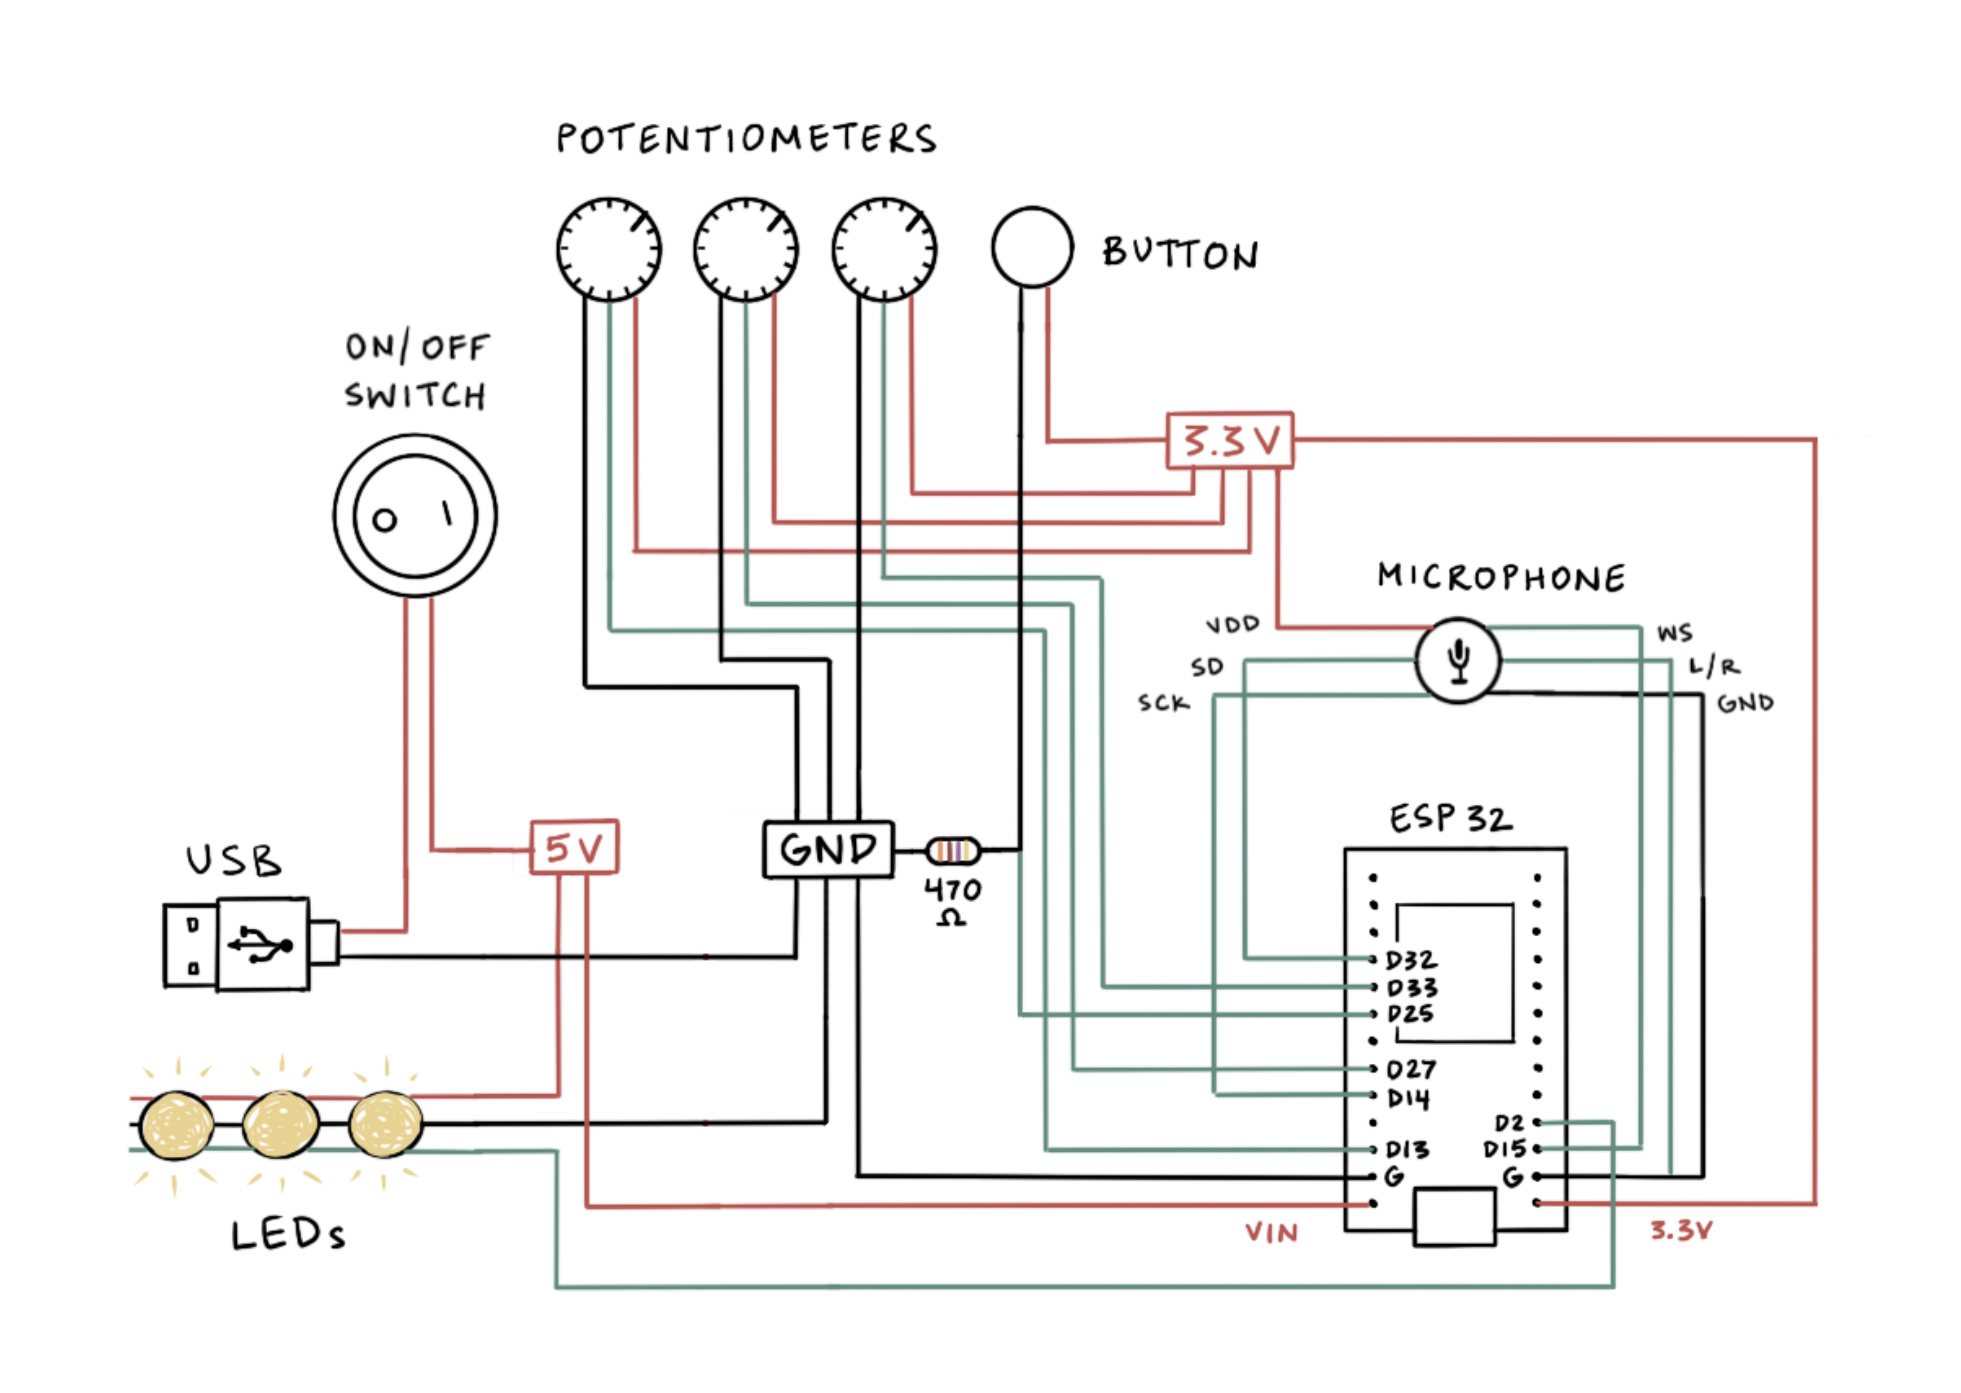
Schematic
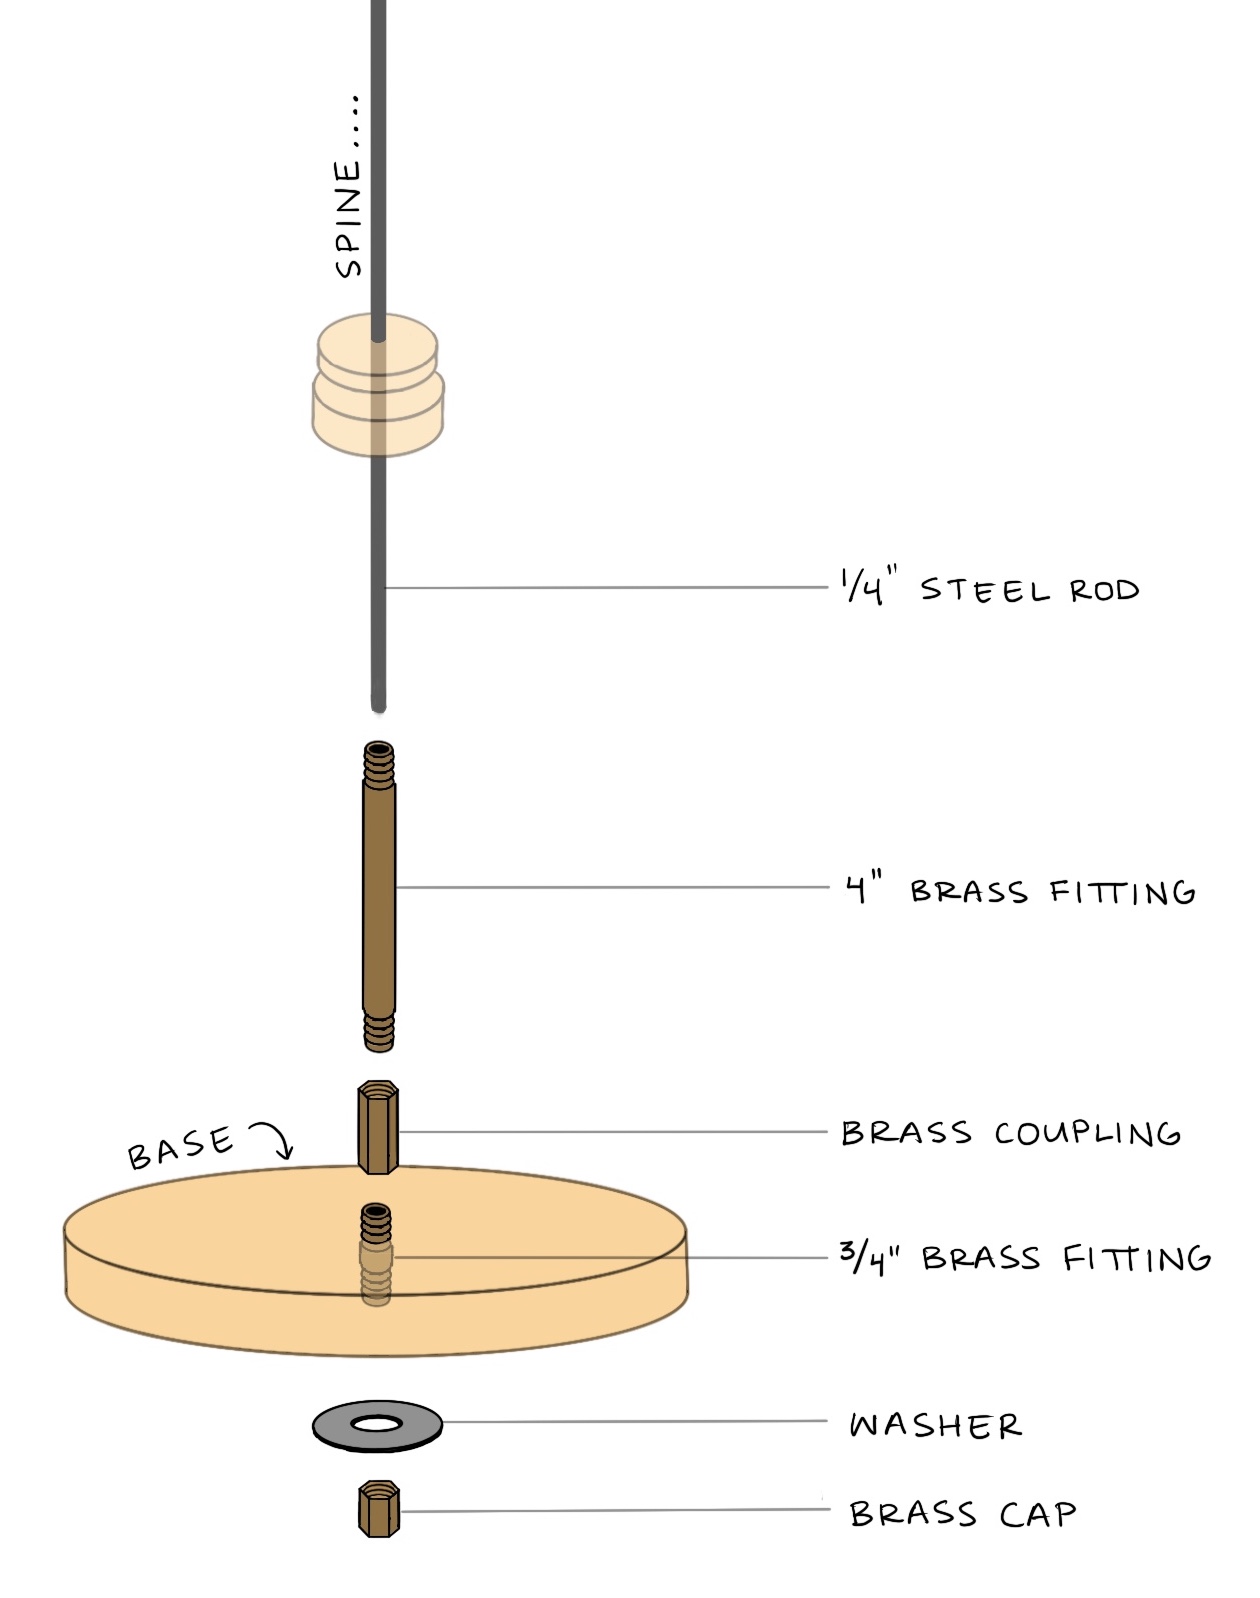
Mount rib cage to base
The mounting system consists of various brass pipe fittings. See the parts list for links to all these pieces.
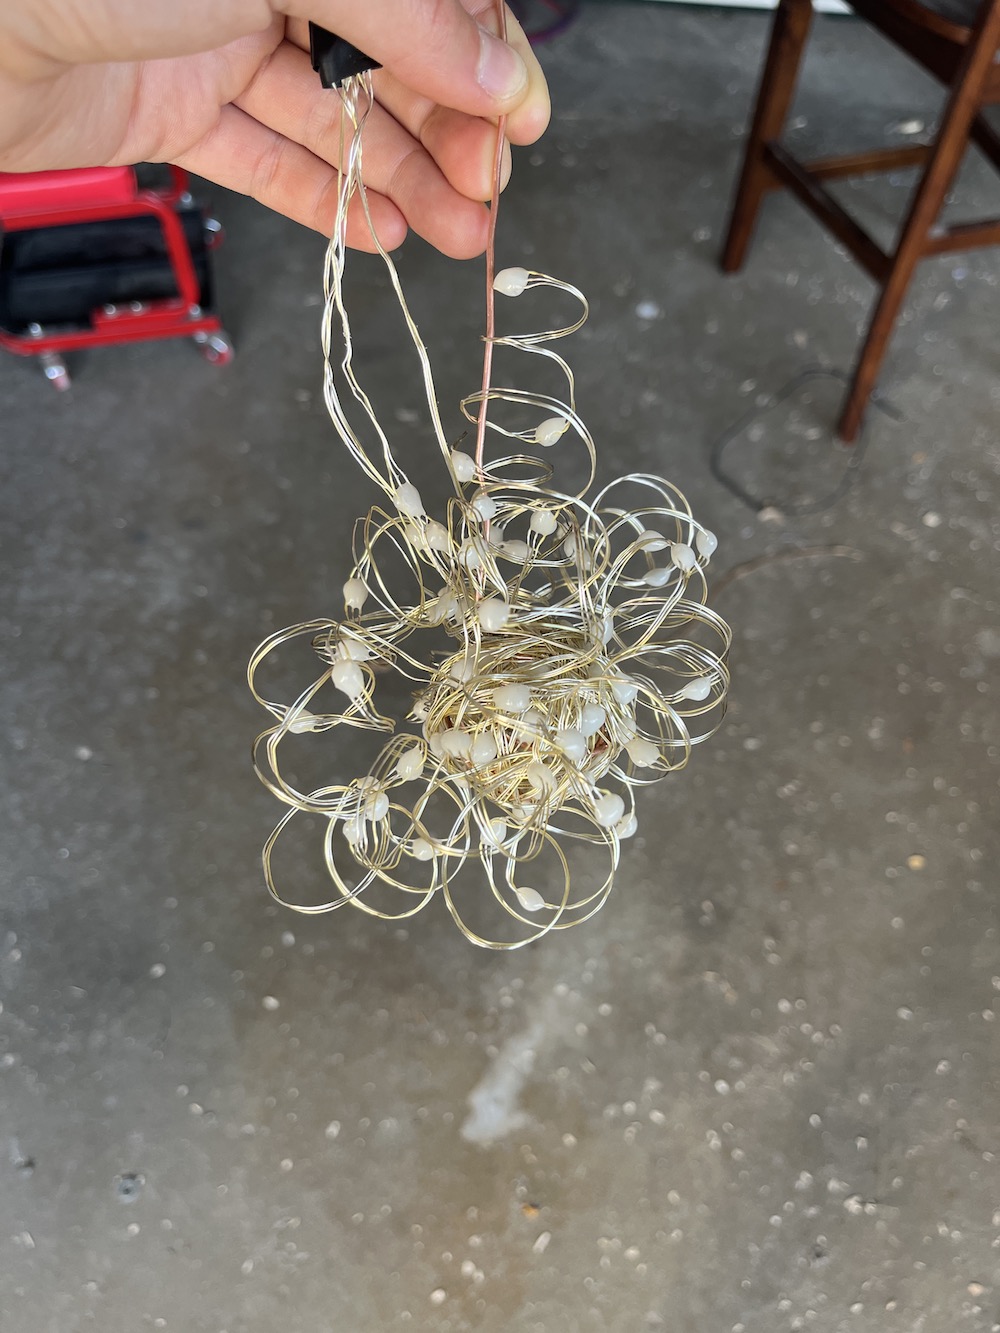
Arrange LEDs, attempt 1: “the bundle”
(Not pictured is attempt 0: “the spider web”, which turned out to be a huge mess of hot glue!)
To make “the bundle”, I soldered together a sphere of solid-core copper wire and wrapped half the LED strand around the sphere. Then I spiraled the remaining LED strand around some PVC pipe, and loosely wound the spirals around the sphere.
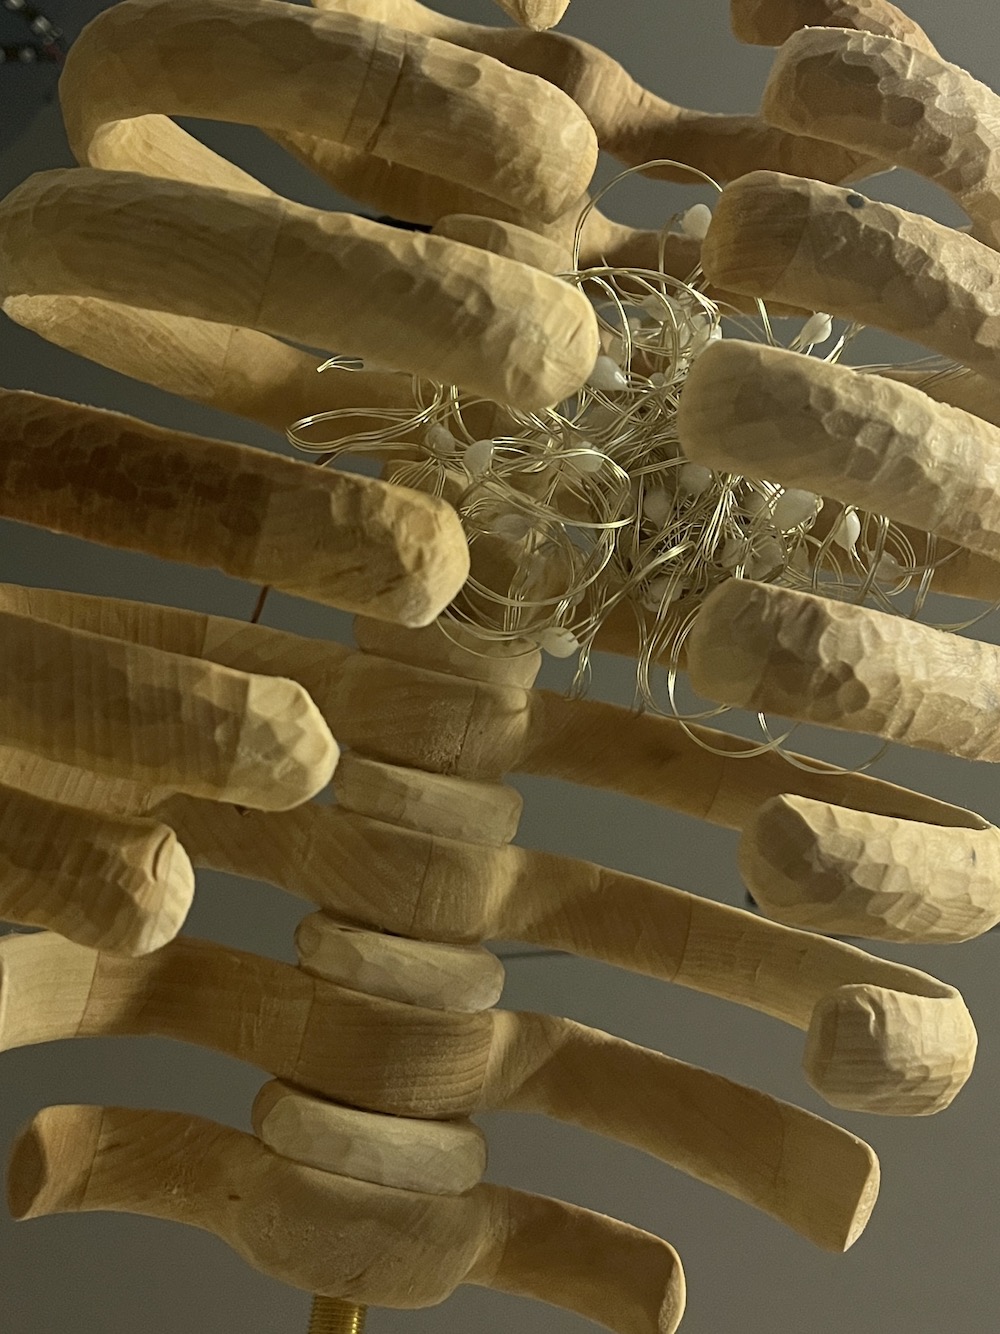
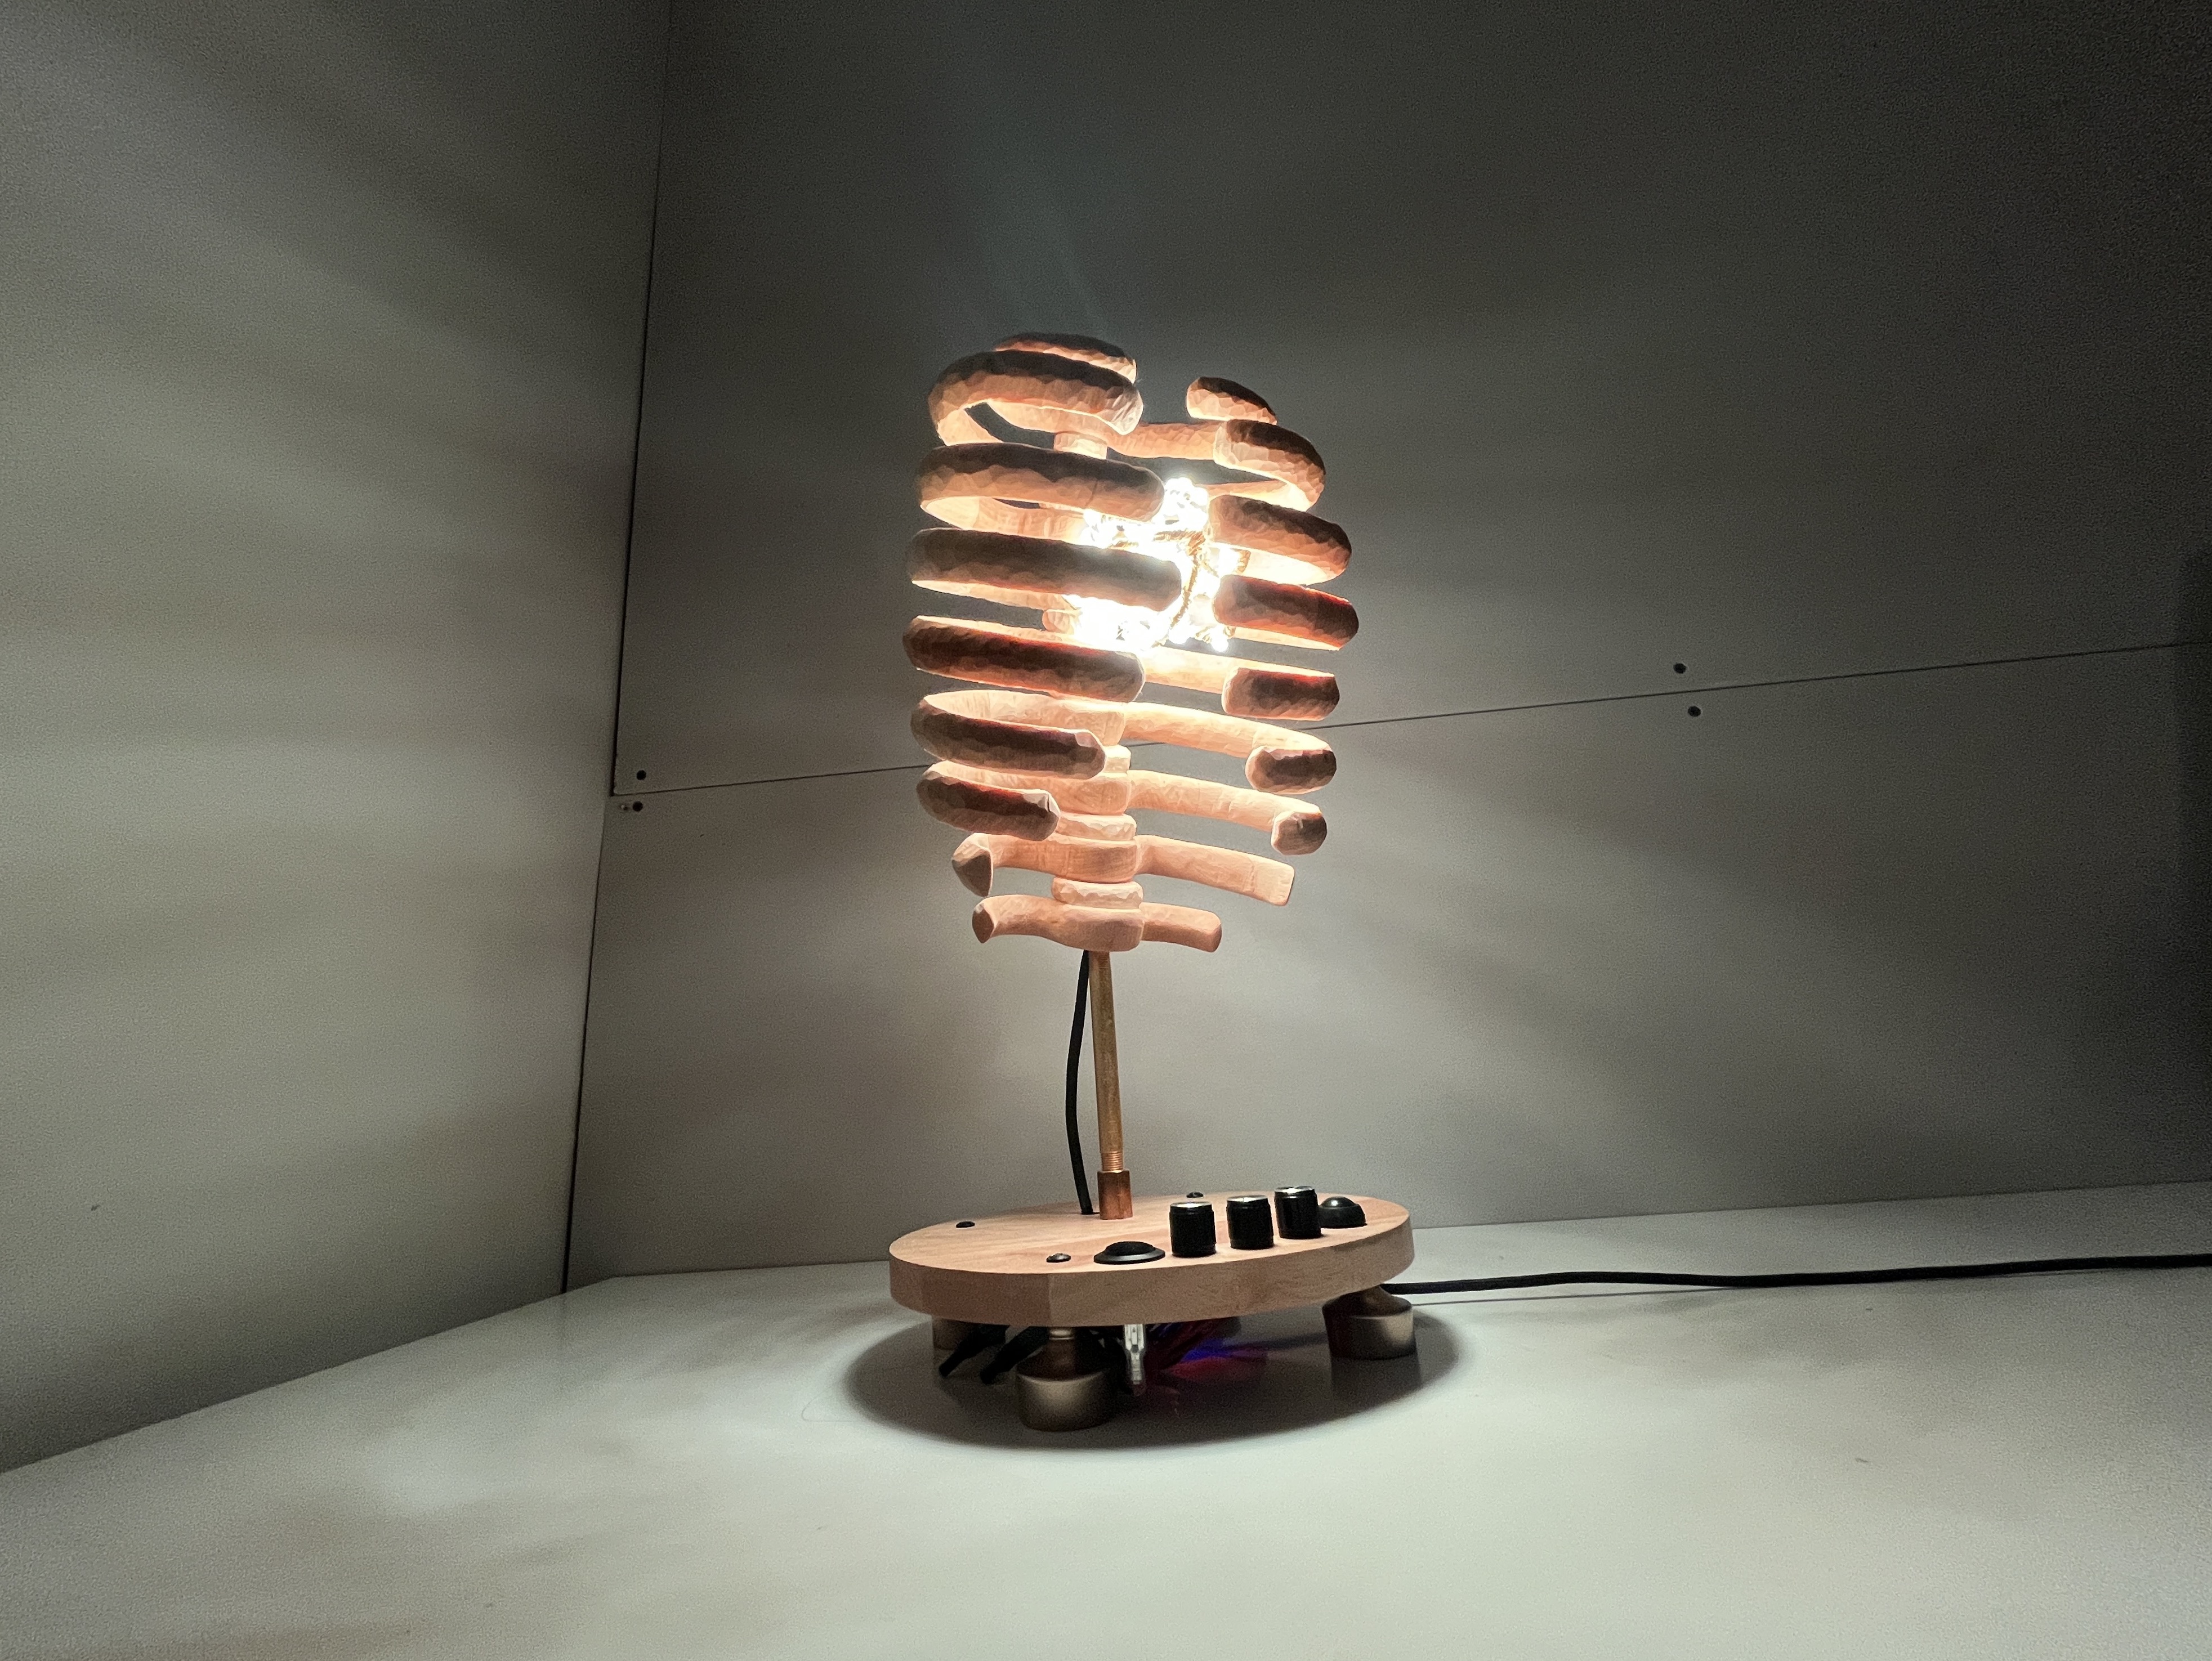
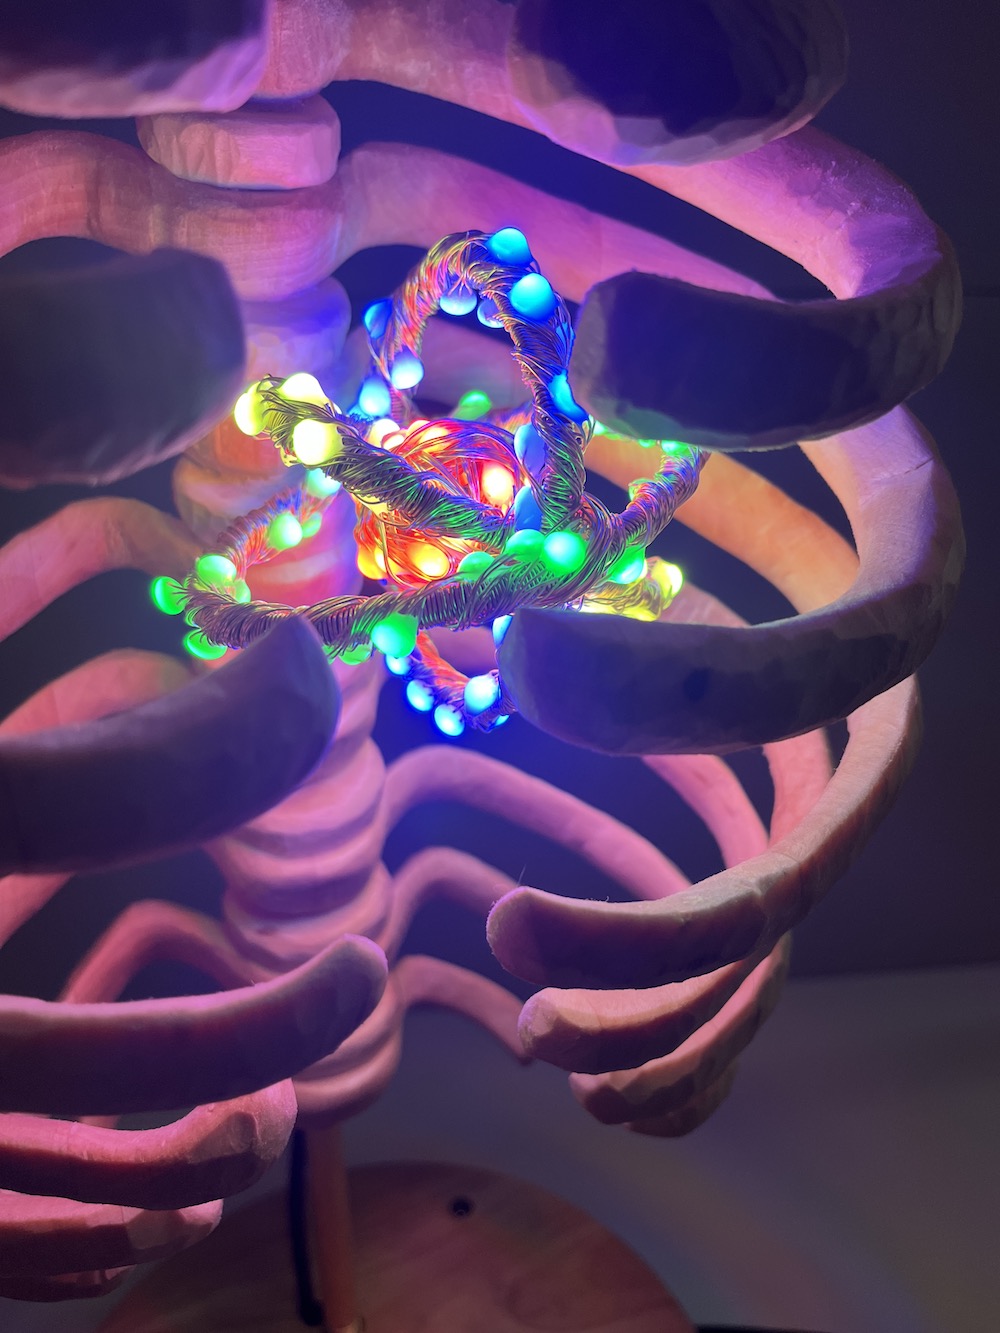
Arrange LEDs, attempt 2: “the atom”
I scrapped the first attempt because it was too delicate and looked messy, but it did spark the idea for the second attempt, “the atom”, because the spirals around the center sphere reminded me of rings of electrons around a nucleus.
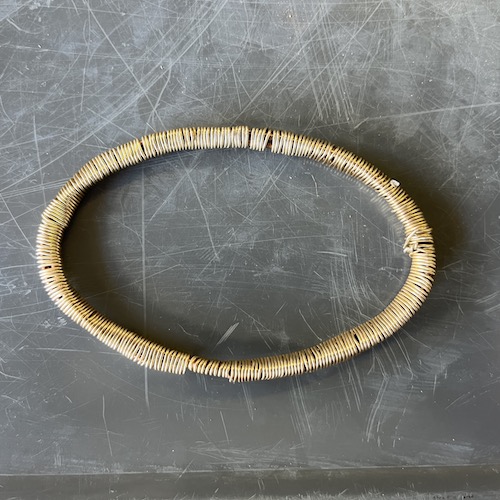
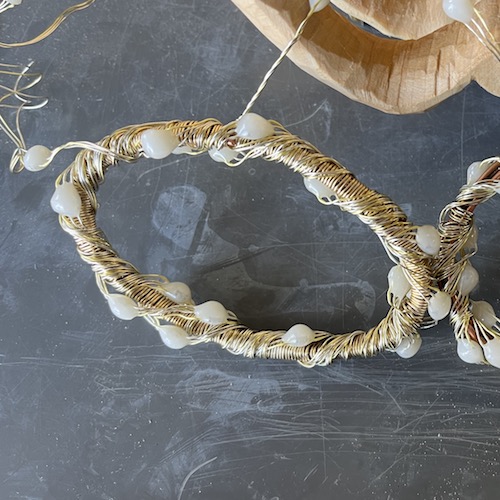
For the atom, I made the nucleus with the same process of soldering a sphere of solid-core wire. Then I bent more wire into 9 oval rings and wrapped garden wire around the rings in groups of 3 to make them look nicer and match the LED strand. I wrapped the LED strand around the rings, and assembled them into an atom shape held together with more garden wire.
Research code for sound reactive mode
I got the sound reactive code from this project by Scott Marley. (I have been following his YouTube channel for a while and have always been a fan!) I decided to use this project as reference because it uses an INMP441 digital microphone, which I wanted to try because I wasn’t getting great results with a MAX4466 microphone. I used his schematic as reference and built my code on top of a clone of his project’s repository. His project uses an LED Matrix with 8 or 16 frequencies. Since the atom doesn’t usually need that many frequencies, I add the frequency values together and map them to the number of LEDs depending on the pattern.
Code all the patterns
There are five patterns that the user can cycle through by clicking the button:
- Solid color
- Heartbeat: looks like the heart is beating in the rib cage
- Atom: “electrons” spin around the atom’s rings
- Twinkle: FastLED’s TwinkleFox example code
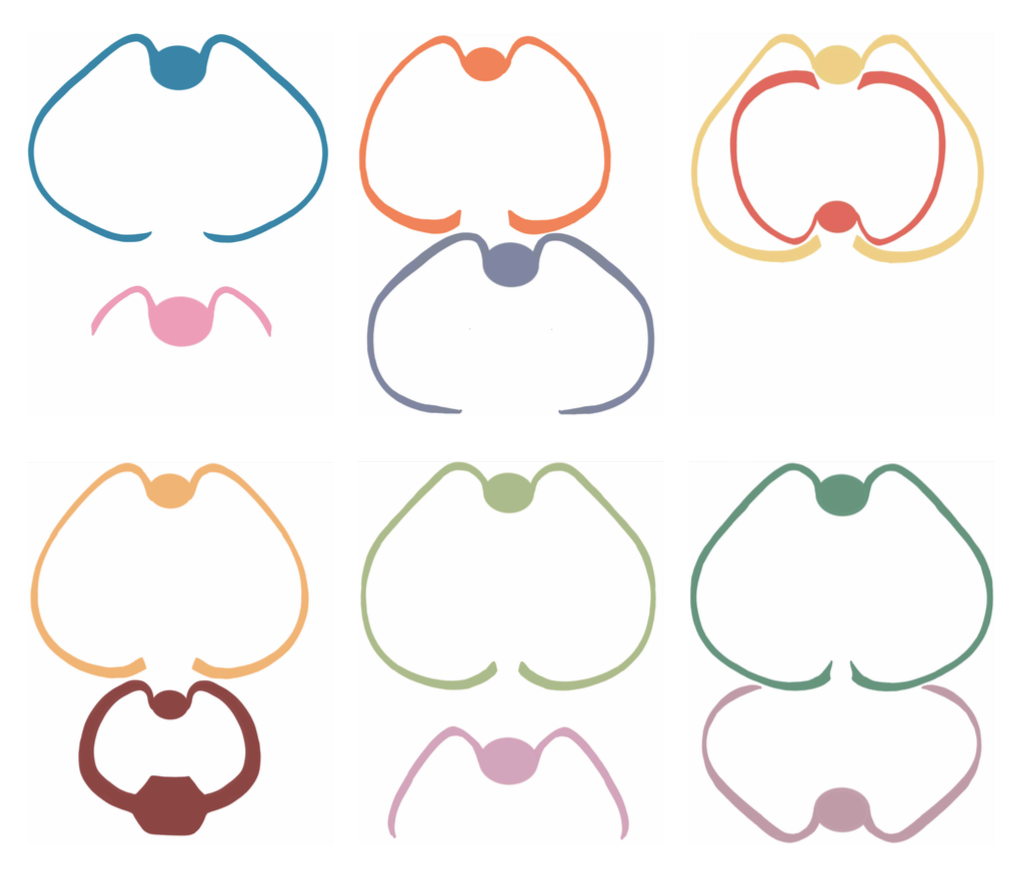
- Sound reactive: LEDs react to audio input from microphone. There are five sound reactive algorithms, which the user can cycle through with the settings knob:
- “Spin”: sounds make “electrons” spin around the atom’s rings faster*
- “Brightness”: sounds make all LEDs brighter*
- “Circumference”: sounds light up more circumference of atom’s rings, mirrored on both sides of atom*
- “Quantity”: sounds light up higher quantity LEDs, scattered randomly
- “Radius”: sounds light up larger radius of LEDs
*For these patterns, the nucleus and three rings are mapped to different sound frequencies - the nucleus reacts to base frequencies, the outermost ring reacts to treble frequencies, and the inner and middle rings react to frequencies in between.
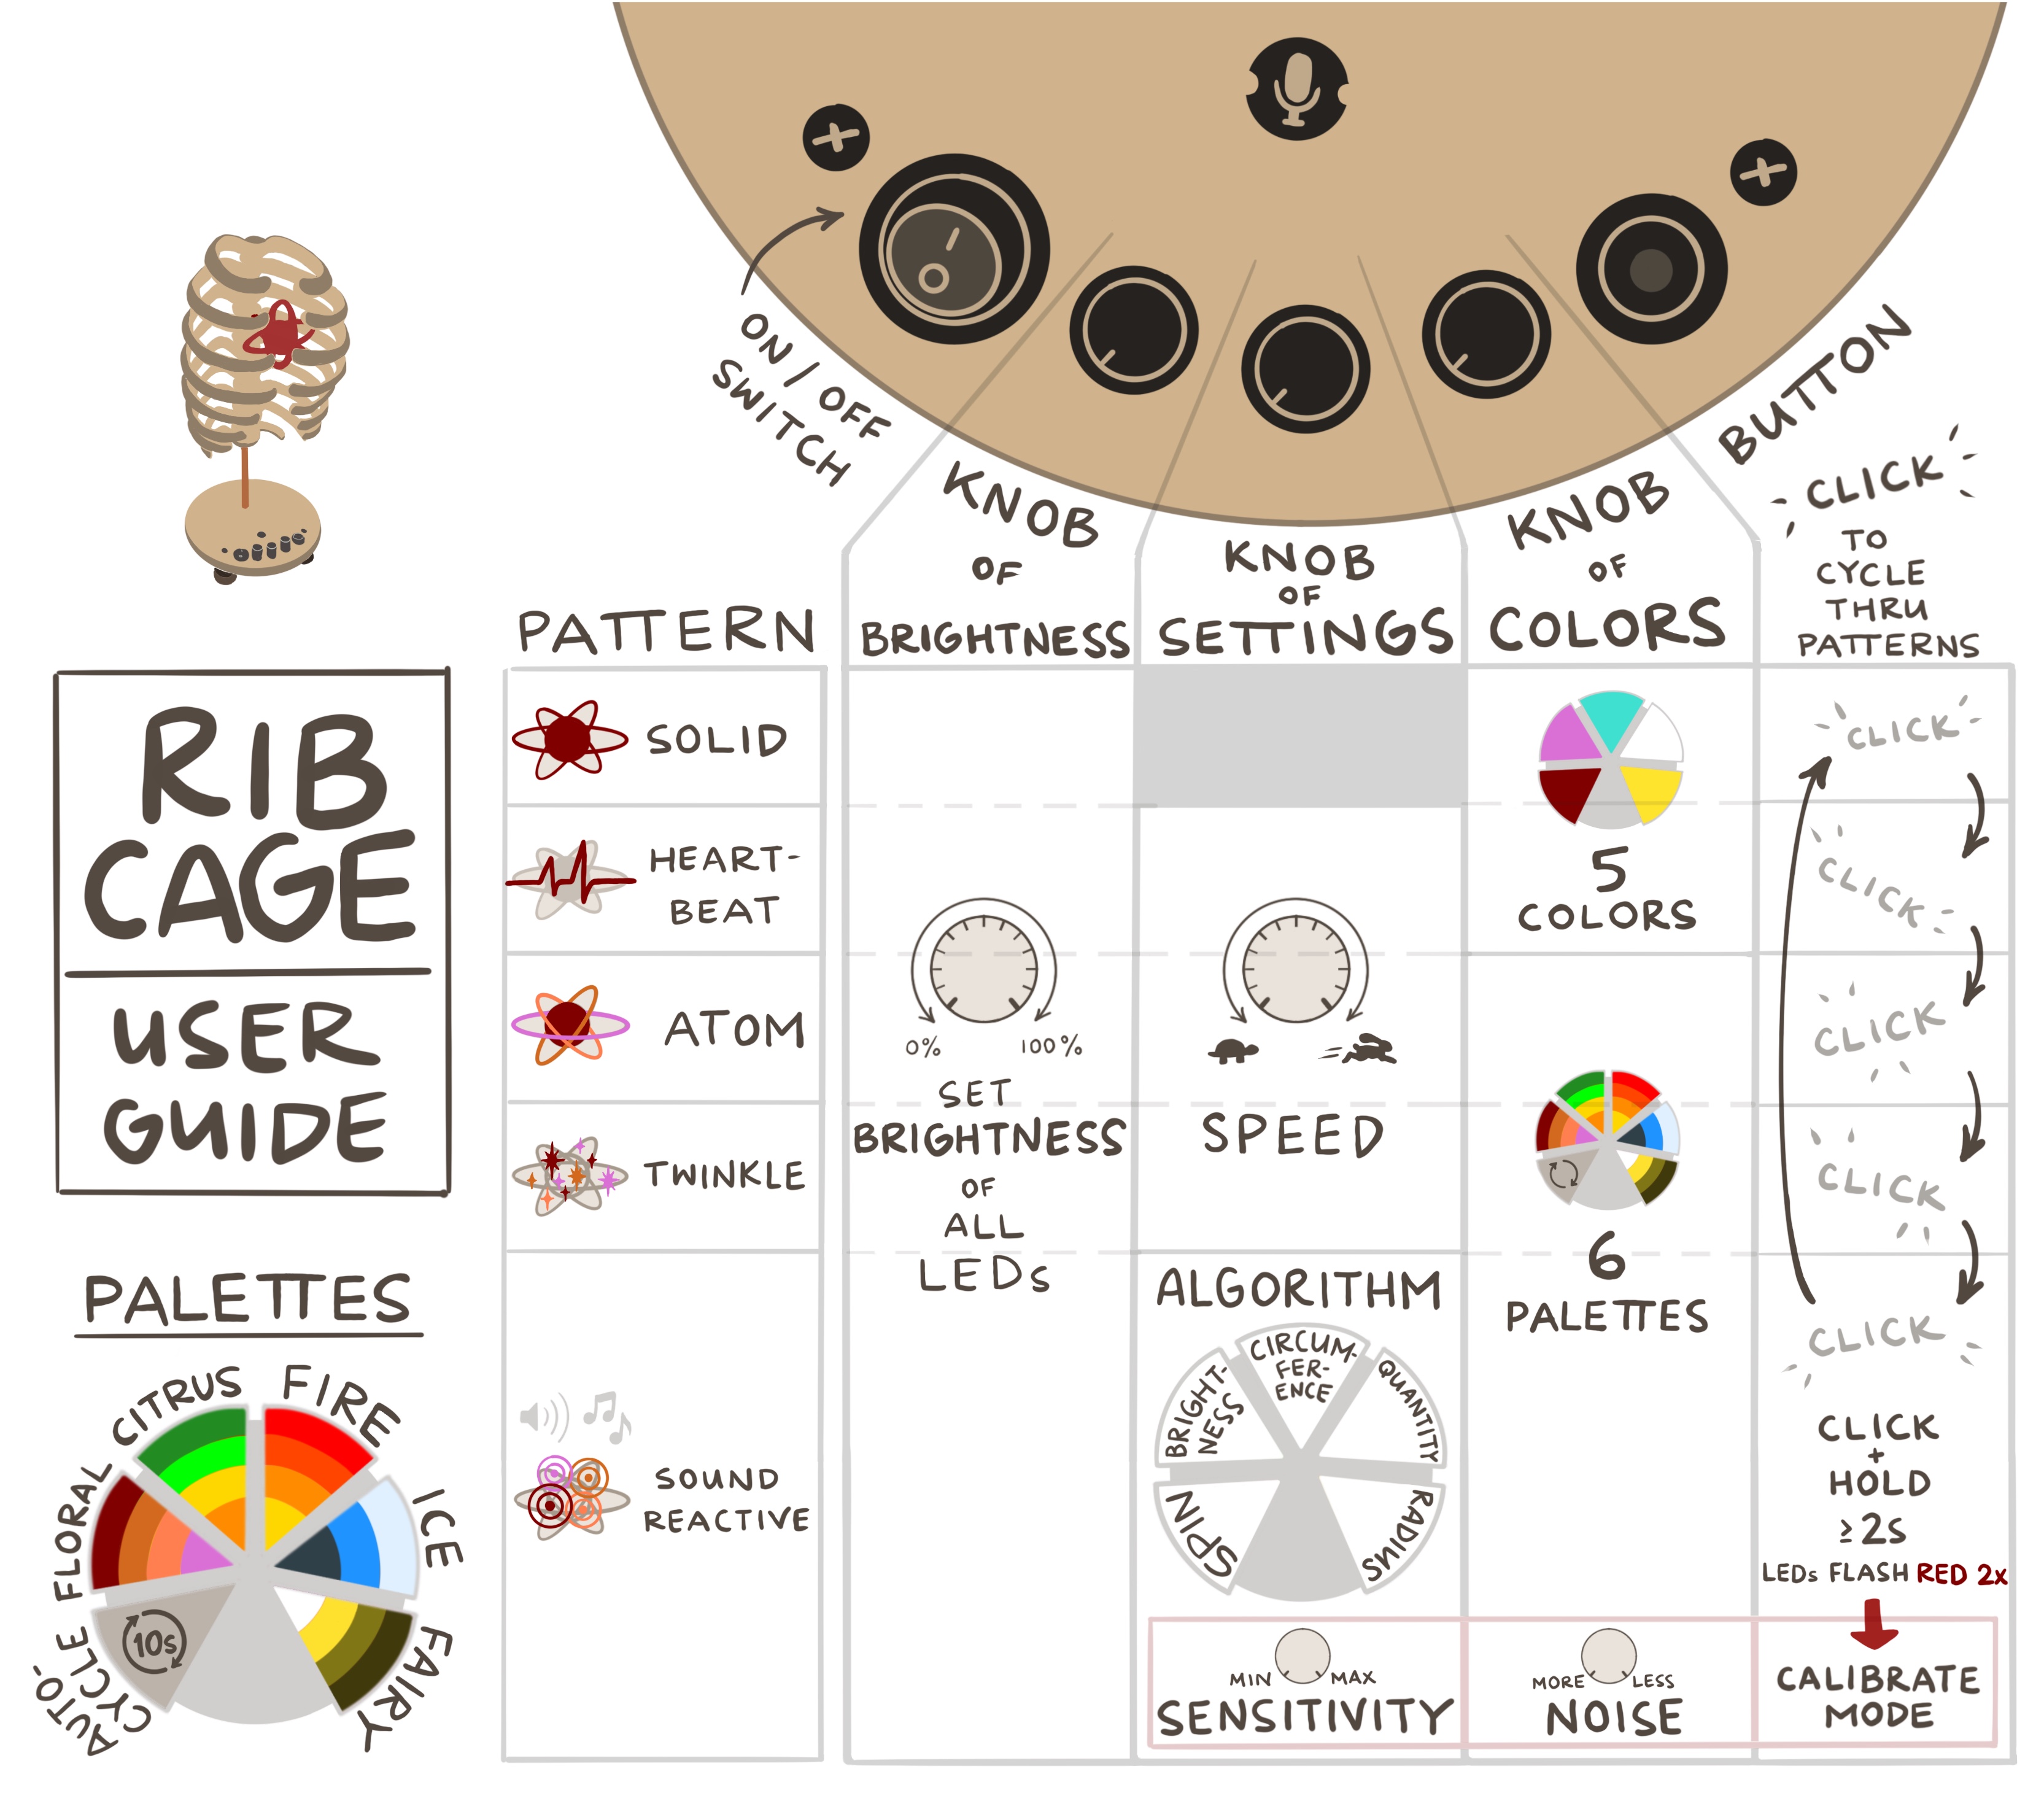
User guide
I made this graphic to help the user visualize all of the different settings and patterns I coded:
Video
Thanks for reading!